Category Archives: In the Kitchen

The Big Jam

My most epic jamming session of the year (or ever, probably). A friend and I started at 8:30am on Friday and went straight through to 1:30am on Saturday. I began again, alone, at around 2:00pm Saturday and jammed until 10:00pm Saturday, at which point I had a huge meltdown and proclaimed that this was the end of my jam-making days. Forever. So there.

Among the flavors: strawberry rhubarb, strawberry plum, strawberry blackberry, plum, apricot, and blackberry kiwi.

The jam train.

The jam train.

Homemade Plum Wine Results

The prize.

The prize.

We finally bottled my plum wine a few weekends ago, and for a first batch, it was actually drinkable. Strong as hell, not the tastiest, full of room for improvement, but drinkable.

Strong as hell

I did two fermentations. Twenty-four hours after the campden tablets dissolved, I made a sugar solution in a quart jar with 2.25 pounds of sugar, 16 ounces warm water, and plum juice and stirred it into the juice in the bucket. I then made a yeast solution (with champagne yeast, recommended for fruit wines) and added that.

When the yeast activity slowed, about 12 days later, I transferred the liquid to a carboy, and did another fermentation with the same recipe of sugar solution. This means I added 4.5 pounds of sugar to 4 gallons of straight plum juice. The wine then sat for about 4 months in the carboy.

When I siphoned the stuff into the bucket for step one of the bottling process, just having it in my mouth gave me a gentle buzz. When I had a less-than-8 oz glass with dinner that night, the buzz did not seem alcoholic as much as it seemed other-drug-like. Relaxing and pleasant, nonetheless.

Not the tastiest

Sarah and I both have a sweet tooth, and this wine is sour. It has a nice fragrance and does not smell vinegary, but it is sour. We experimented by adding sugar to the desired sweetness. This made the wine more palatable, but if it weren’t homemade, I can’t honestly say I’d be drinking it. I sent a bottle off to Richard, my plum wine-making mentor, who prefaced his responding email, ‘DO NOT DUMP THIS WINE!’ He’s very positive. He thought the wine was too acidic, but has good color and is decent for a first attempt.

In the meantime, after we bottled it, I discovered all kinds of online literature that pointed to sweetening wine before bottling it, but cautioned that the yeast may undergo another round of activity. A home-brewing friend said champagne yeast is rather notorious for behaving this way and suggested sweetening after opening the bottle.

Full of room for improvement

1. I don’t even really like champagne or other dry wines. And the back-taste of champagne is quite present. I think I’ll research other suitable yeasts.

2. The plums weren’t necessarily ripe. The tree had been stripped clean, plum ready or not. I think I’ll opt for ripe fruit next time, or a bit overripe, or some combo.

3. Yes, I will add more sugar.

4. But I think I’ll taste-test more along the way, too. Doh!

5. Did I let the wine sit in its yeast debris too long? Maybe I should have siphoned it off, then let it sit. I remember Richard saying he strained before letting it sit for a few months.

Drinkable

It is. It has a great color and clarified nicely (an attribute of champagne yeast apparently). It isn’t horrible, it’s just not as good as it could be. I think I have 10 bottles. I used it to cook a pork roast one night. The more applications, the better, I think.

Cheers!

Pre-siphoning. The wine clarified nicely.

Pre-siphoning. The wine clarified nicely.

Bottling the wine after siphoning and filtering.

Bottling the wine after siphoning and filtering.

 We made improvements in our 2013 plum wine! Check out Homemade Plum Wine, 2013 for details. If you want to try making the best plum liqueur we’ve ever tasted, read up on Not-Traditional Umeshu.

Overall Gardener Takes to Twitter

Overall Gardener on Twitter??! Ack. I love to garden, and I love to write, but technology and social media are not really my strong suits. So it was with trepidation a year ago that I signed up for a Twitter account for the Overall Gardener blog. I believe I posted one tweet right away, before letting the account sit idly for over a year. What’s Twitter good for, anyway? I’m still not quite sure.

Clearly, I’m not doing a great job of selling you on my brilliant gardening tweets, but if you are brave of heart and not easily bored, stop by. I even figured out how to include a nifty button on the right-hand side of the blog which you can click in order to “follow” my tweets. And better yet, drop me a line and point me in the right direction. Until then, I will be roughing it alone with the handle, @OverallGardener. Yikes, I never thought it would come to this.

Spinach Pesto

Why wait for summer basil? I recently concocted a winter pesto recipe that I’m exceedingly fond of. Not only does it pack the flavor punch of traditional basil pesto, it makes me genuinely happy to eat raw spinach (and olive oil and Parmesan cheese, and nuts, and…!). I’ve taken to eating it on crackers, dolloped on sautéed chicken (sorry, girls), and mixed in with salads of various sorts.

But maybe the thing that pleases me most about my new spinach pesto recipe is that it allows me to use winter garden greens to create a wholly pleasing version of one of my favorite summer foods. Sure, I could drive to the store and buy some foreign-born basil to blend up a batch of pesto, but I can just as easily meander into the garden and repurpose an oft-maligned vegetable to create a delightful seasonal spinoff.

Without further ado:

6 large cloves of garlic

½-1 teaspoon salt (to taste)

1 cup olive oil

Juice from one juicy lemon

1 cup cashews or walnuts, chopped (unless you have an awesome blender)

1 cup Parmesan cheese

2 packed cups spinach, chopped

2 packed cups parsley, chopped


You know your own blender best. If it’s fabulous, simply crush the garlic with a garlic press and add to the blender or food processor along with all other ingredients. If, on the other hand, it’s anything like ours, you will have to chop the nuts and veggies first and add ingredients in small batches, blending as you go.

For the record, this recipe is almost equally tasty without the cheese. If lactose isn’t your friend, don’t hesitate to exclude the Parmesan. A final warning: this spinach pesto is very garlic-y. Modify as you see fit.

Not-Traditional Umeshu

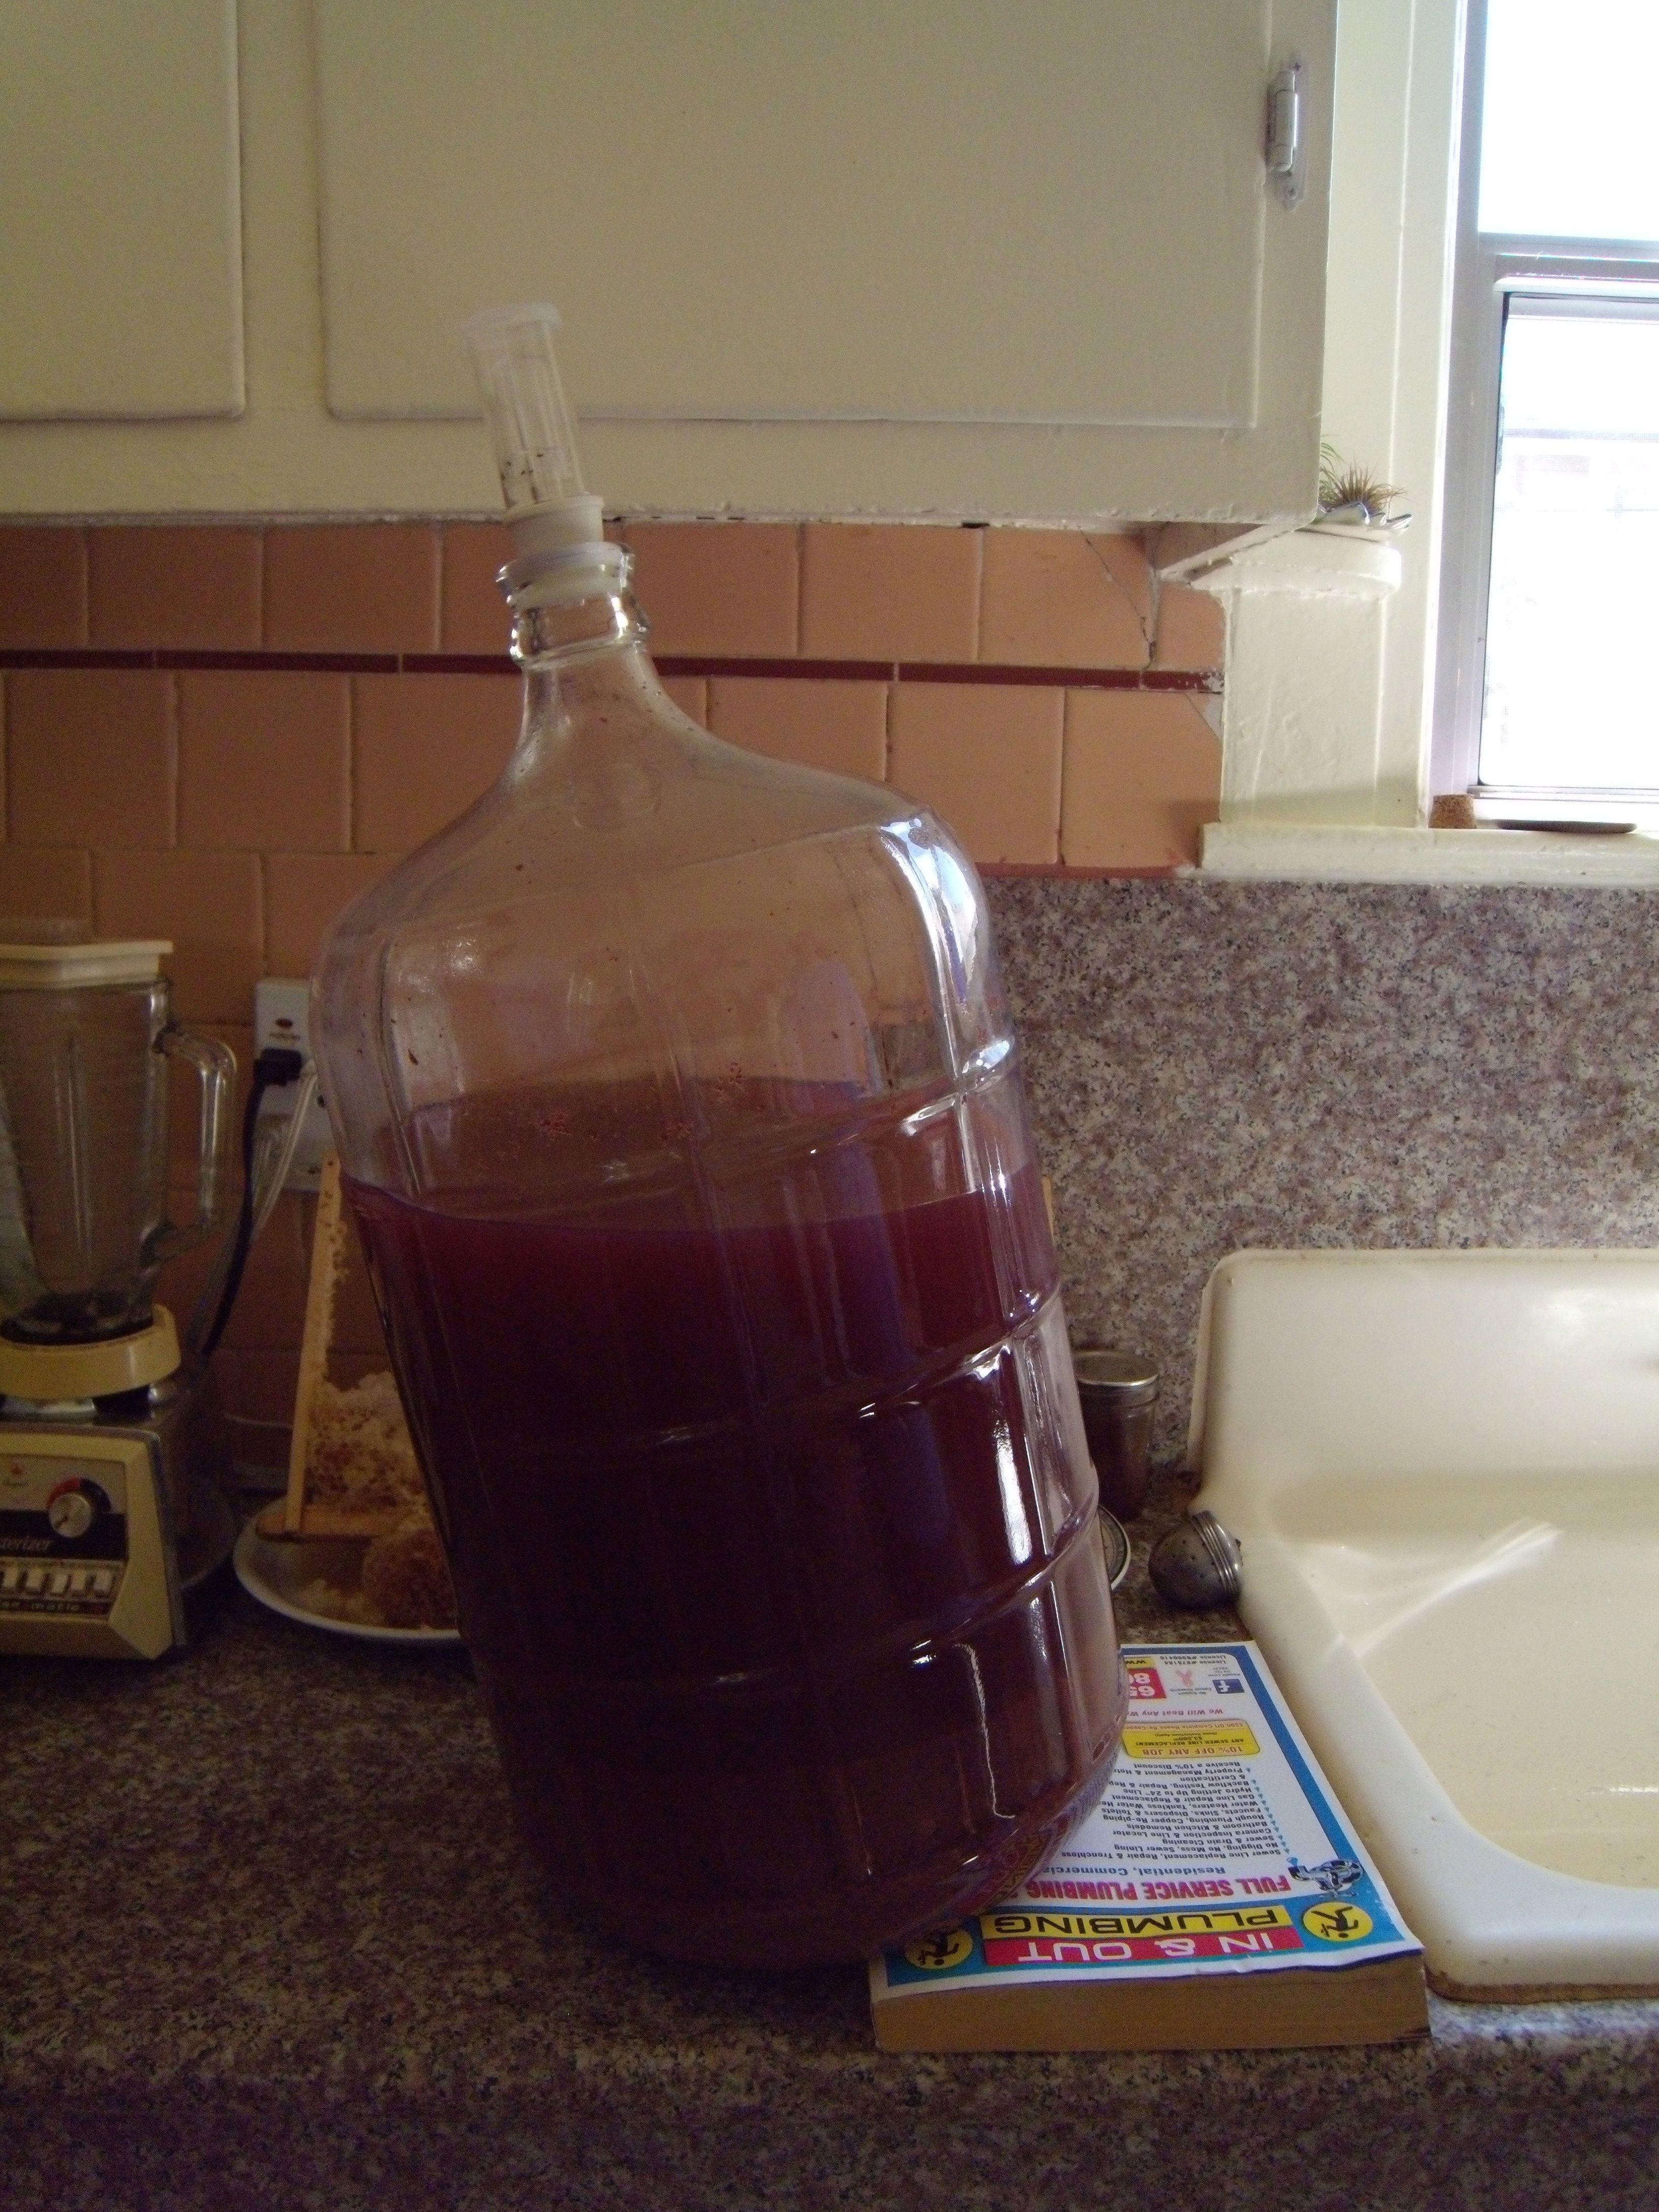
One of the by-products of my plum juicing was a few pounds of skin, pits, and pulp with some juice to spare. While I researched plum wine recipes, one of the simpler ones I encountered was Japanese Plum wine, or Umeshu, more like a cordial or liqueur with no yeast and racking involved. While it calls for unripe Ume plums, a traditional Asian plum on the sour side with low juiciness, the recipe suggests Western plums, apricots, and quince might substitute nicely.

For us gardening nerds, Ume plums are the fruit of Prunus mume, which in this hemisphere is known as ‘flowering apricot,’ and which is the mother of several cultivated varieties, such as the once-popular ‘W.B. Clarke,’ a beautiful weeping form. In my early gardening years in Oregon, these small, flowering trees burst out in pink to white bloom in the late winter rains of the Willamette Valley.

Not wanting to waste the pulp, I decided to see if I could make a not-so-traditional Umeshu wine with it. While I wasn’t able to find rock sugar, I found the shochu recommended in the recipe. This is a clear alcohol, typically between 25 and 42 proof, commonly distilled from sweet potatoes, barley, rice, buckwheat, or some other grain. I found one made from barley, 48 proof, in the ‘Vodka’ section of a chain liquor store.

Everything I ever learned about math I have forgotten

I weighed my pulp to calculate the right proportion of cane sugar. The recipe calls for a ratio of 1 pound plums to 1 pound sugar for Ume wine. Since I used Santa Rosa plum pulp, I decided to use less sugar, roughly following the 60% plum and 40% sugar recommendation. Since my math skills leave much to be desired and I am a terrible record keeper, I suspect I weighed the plums, then halved the weight and added that amount of sugar plus some so that the sugar weighed about three-quarters what the plum pulp had (eg, if I had 6 pounds of pulp, I added 3 pounds of sugar, plus about 1 pound. See what I mean?).

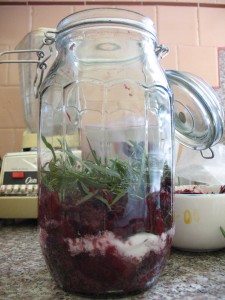
I used a 2 1/2-quart jar with a rubber gasket lid, layering the plum pulp with the sugar. I decided to add fresh tarragon from the garden for a twist, placing five or six 4–6″ sprigs in two of the three layers. I finally covered it all with shochu.

plum:tarragon

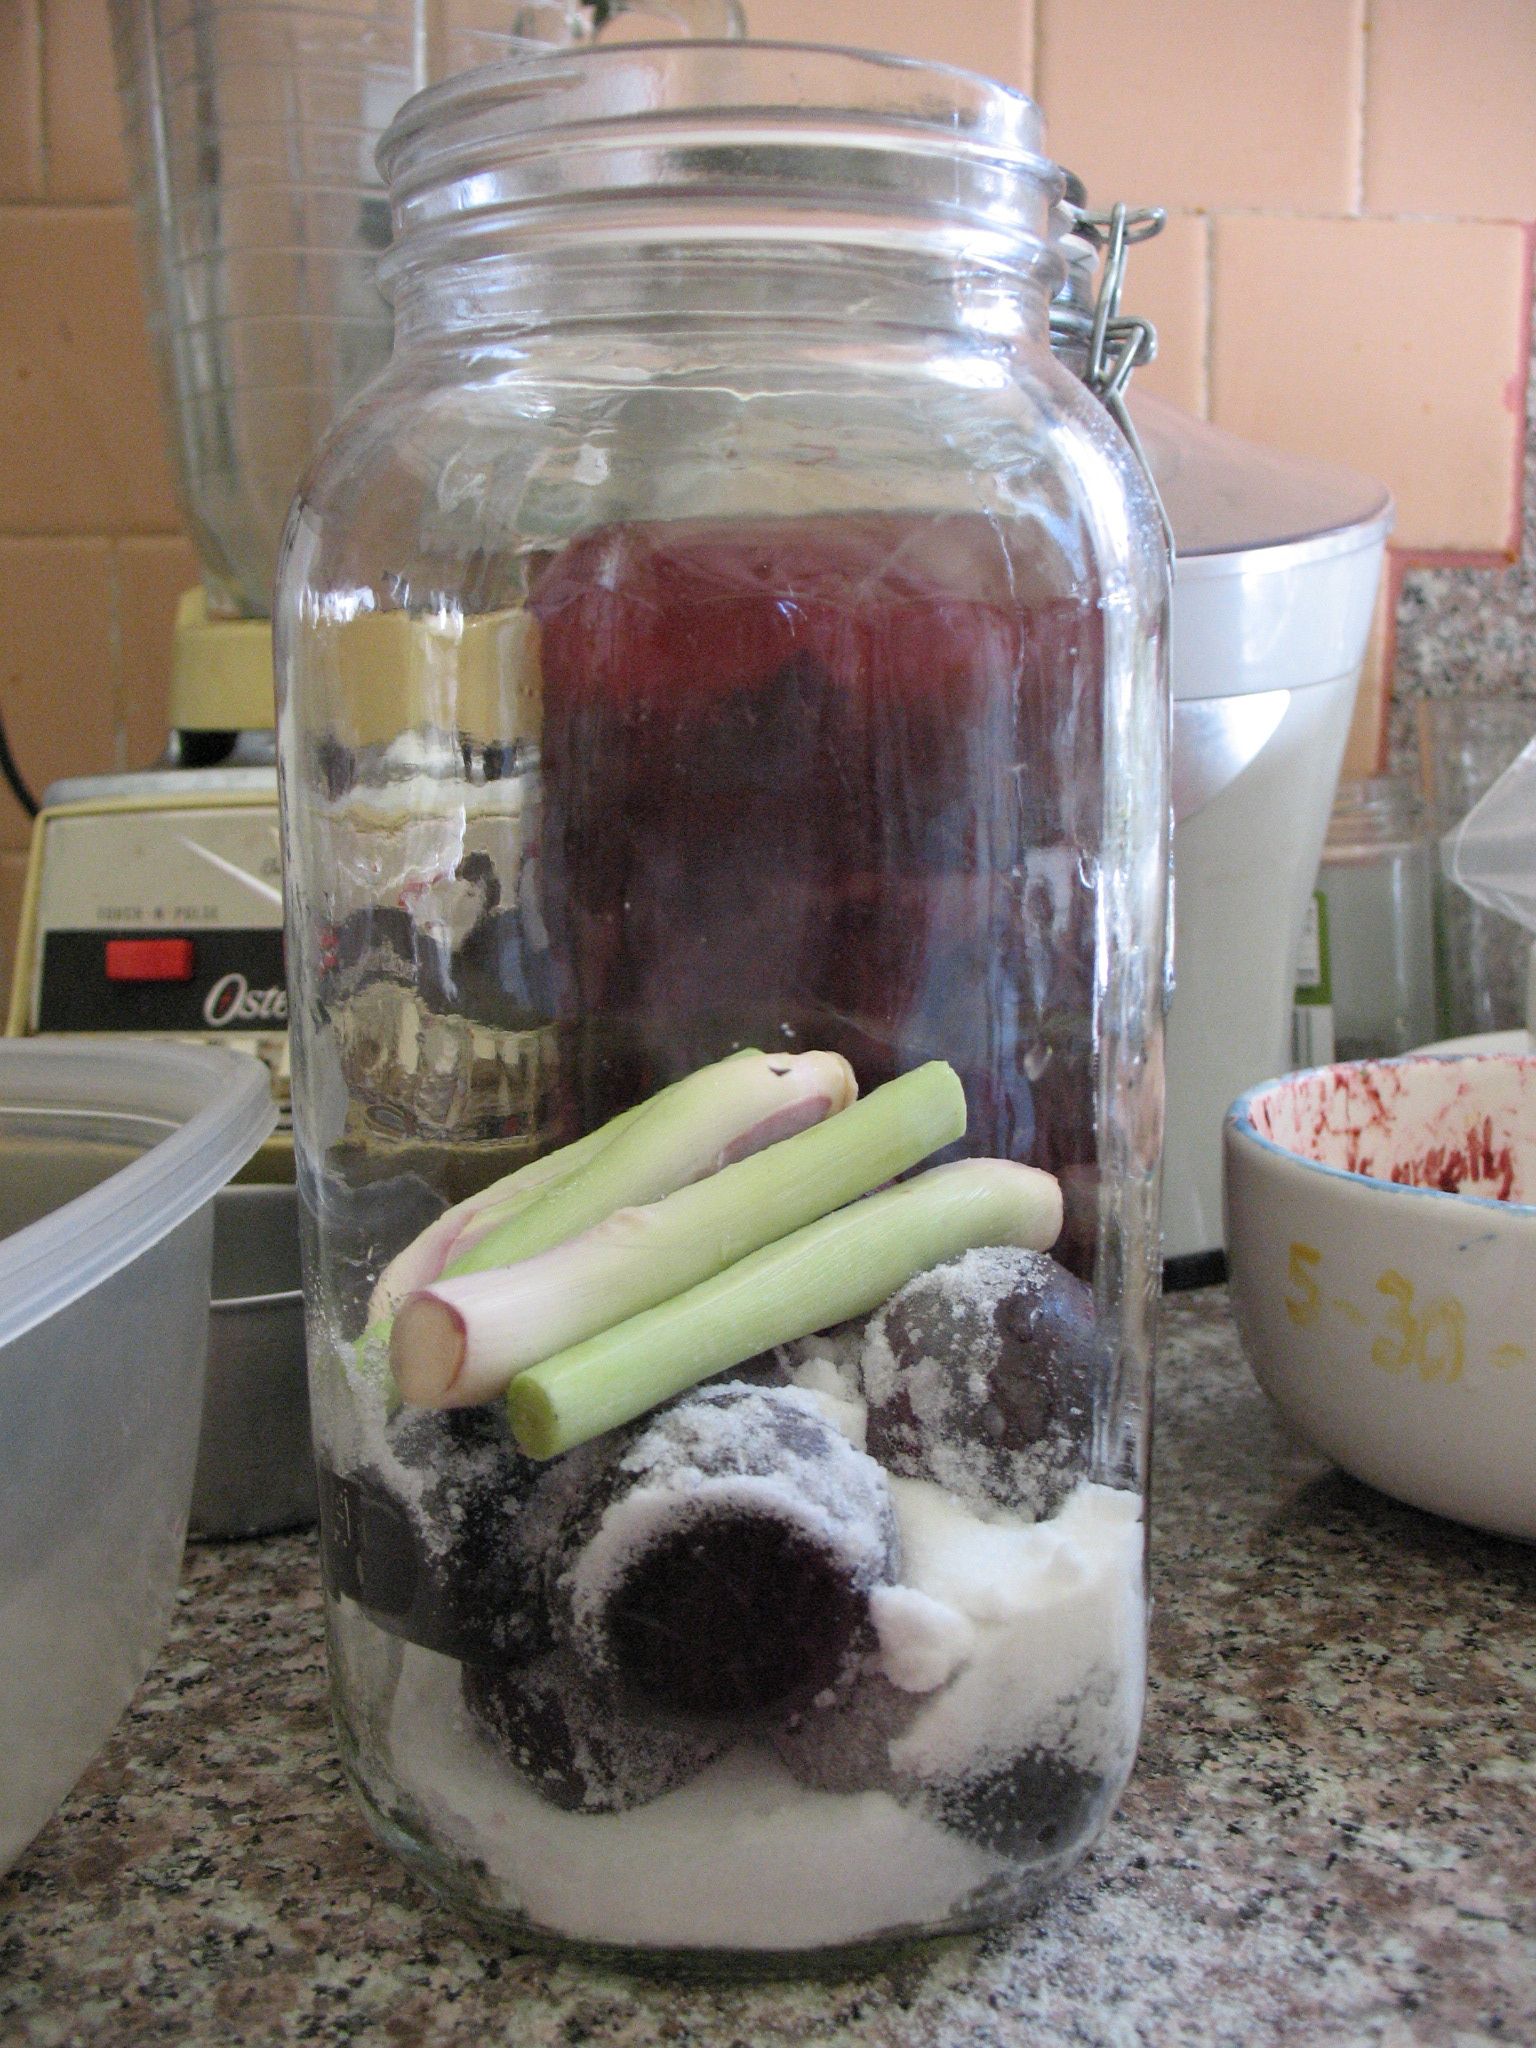
Since we had a small Santa Rosa plum harvest, I decided to also make a batch of plum liqueur with whole plums, more like the recipe. For this batch, I used a 2-quart mason jar with a screw-on lid. I again used the 60% : 40% recommendation, or something close. I also added 4 chunky stems of lemongrass from the garden in one of the layers. Since the recipe states that the jar should only be filled halfway, I did so, then added the shochu to cover the plums et al.

plum:lemongrass

Ch-Ch-Changes

For the record, I should share a few modifications. First, because the plum pulp was so dense, and I could see air pockets in the jar, I decided to shake the jar after a few days to dissolve some of the sugar so that the shochu could penetrate to the bottom. This dissolving might have happened on its own, but I tend to worry a bit, so I facilitated the process.

Second, after about a month, I ended up adding more shochu to both jars. In the mason jar with the whole plums, a bit of mold formed on a part of a plum above the level of the shochu. I opened the jar and removed the mold, then added more shochu, so that it was well above the level of the plums, to about the 3/4 mark of the jar. I also changed out the lid for a new one. To be safe, I added more shochu to the other jar, too, nearly to the top. Throughout the next five months, I shook the contents of both jars gently to guard against further mold growth. It seemed to work. Neither jar exploded, as the author has experienced.

Five months later

A few weeks ago in mid-January, I strained the contents of the plum pulp liqueur. I used a fine mesh bag that I had used to juice the plums, and ‘milked’ the contents into a bucket and bottled it. This batch is amazingly jammy and velvety, and has quite a bit of sediment, which I am ok with. We couldn’t taste the tarragon at all. I probably used too little, since I was worried about an overwhelming taste or bitterness. Next time, I might lightly bruise it. In this batch, the ratio of solids (plum, sugar) to liquids (shochu) was roughly visually equal.

I then strained the other batch, made with whole plums. Again, we could not taste the lemongrass. If I were to use lemongrass again, I would lightly crush it. Since this batch had a significantly higher ratio of alcohol to solids, we had to take a few tastes before deciding we really liked it. The shochu imparts a little sweetness, but the plum taste comes through, less jammy, but fruity nonetheless. This batch, too, has quite a bit of sediment. I suspect that if I had not squeezed out nearly every drop of liquid in both batches, the sediment might not have made it through the bag’s filter.

Unscientific conclusions

In both batches, the sugar content did not detract from the fruit’s flavor, but I would still add less next time, say, half or one-third the weight of the fruit. Santa Rosa plums have a nice balance of sweet and tart, which I would like to experience more in the liqueur. And I am going to use this rough fruit to sugar ratio in the next liqueur recipes I’m dreaming up. I hope the ratio is rather universal, and not specific to plums, apricot or quince.

The success of the plum pulp liqueur suggests that it may be possible to use fruit debris left over from other projects to make a liqueur; I even thought of reusing the pulp just to see what kind of flavor I would get on a second generation batch. But I decided to move on to the next creation.

I have been bitten by the liqueur bug.

Mad About Fresh-Pack Pickles

Last year, in a bid to make my own version of our favorite sandwich fixing, I planted two Bushy Pickling cucumber plants. They cranked out a phenomenal number of cukes, and I soon found myself in desperate need of a pickle recipe.

I was too intimidated to try the traditional fermentation process, and too hell bent on a winter larder to opt for refrigerator pickles.  Instead, I chose the middle path: fresh-pack pickles. But, before we go on, a novella on canning safety.


Botulism prevention, the name of the game

I have hesitated in the past to share canning recipes or information because of the serious safety concerns that go along with home canning. Botulism is a bacterial nerve toxin that can crop up in improperly canned foods. Low acid vegetables are especially prone to botulism contamination and pressure canning is used for this reason. I don’t own a pressure canner, so I am more limited in the types of foods I can, and I take care to follow recipes from reputable sources and make my canning process as hygienic as possible. The CDC has a helpful and very sobering page with information on botulism here.

Water bath canners are not suited for canning low acid vegetables.

I learned to use a water bath canner in my grandmother’s kitchen. She was a stickler for hygiene, but I never saw her use a recipe, or refer to a list of CDC guidelines. I’m sure many people can this way, and many people get away with it. However, don’t take my word for anything. If you are new to canning, educate yourself on the dos and don’ts and avoid even the most remote possibility that you will seriously injure or kill yourself or a loved one. I don’t mean to be overdramatic here, but I really do believe in the importance of taking safety risks seriously when canning.  Here is a link to the USDA Complete Guide to Home Canning.

Fresh-pack dill pickles

The original recipe that I stumbled across last year in my quest for fresh-pack pickles is courtesy of Duluth Community Garden Program. My take on the recipe was such a hit in our pickle-crazed household that I resurrected it for this year’s round of pickling.

As with any canning project, proportions are essential for safety reasons. I don’t mess with the balance of acidity, sugar, and salt in recipes, because these ingredients are essential for staving off dangerous bacterial growth in home canned foods. I do, however, love tweaking flavors. In that spirit, here is our favorite fresh-pack pickle recipe:

Dill pickle ingredients:

  • Pickling cucumbers between 2-1/3 and 3 inches long (or larger cucumbers cut to size)
  • Yellow onion sliced ¼ to ½ inch thick
  • Garlic cloves
  • Carrot slices
  • A generous wad of dill weed, or a handful of dill seed
  • A handful of mustard seed
  • Fresh grape leaves (if you have them. They help keep the pickles crisp, and they’re tasty, too.)
  • Hot peppers (also optional)

Brine ingredients:

  • 2 cups white vinegar (4%-6% acidity),
  • 6 cups water
  • 1/3 cup canning salt (kosher salt)

Make the pickles:

  • First, gently scrub the cucumbers to remove spines. This is most easily done just after picking, and it’s important to make the pickles right away to prevent mushiness. Kelly says time of harvest is also important. Cucumbers picked and canned early in the morning will be more crisp than those picked later in the day.
  • While you’re working, sterilize jars and lids per canning jar instructions.
  • Prepare all other ingredients—cut large cucumbers to size and taste for any bitterness, slice onions, peel garlic cloves, and wash dill, peppers, and grape leaves.
  • Combine brine ingredients in a large pot, stir, and bring to a boil. Depending on how many cucumbers you have, you may need to double, triple, or even quadruple the brine recipe. My last batch of pickles used 4.25 lbs. of cucumbers for a total of seven quarts, and I almost used up my triple batch of brine. The original Duluth recipe is way off when it asserts that one batch of brine is sufficient for six quarts of pickles.
  • Remove hot jars from water bath and add ingredients, stuffing cucumbers in last.
  • Using a canning funnel, ladle boiling brine into jars and fill to within ½ inch of rim.
  • Wipe rims with clean paper towels.
  • Place hot lids on jars and screw closed finger tight.
  • Return jars to not-quite-boiling water (you don’t want them to break!) and turn the heat up all the way.
  • Process for 10 minutes, counting the time from when the water returns to a simmer.
  • Remove jars from water, placing them on a wire rack, board, or, if you’re like me, a towel on the living room floor. Do not disturb the jars or tighten the bands for 24 hours.
  • Endeavor to wait a respectable length of time before you begin devouring all the pickles! (You should wait at least a week for the pickles to soak up the briny goodness.)

The cucumber plants are looking a little worse for wear at this point in the season, but I’m crossing my fingers for one more batch of pickles.

August Harvest

It’s a lean summer in the garden. In an attempt to make less gardening work for ourselves, we opted to leave two beds unplanted. But besides that, the tomatoes haven’t done much, and the eggplant is taking its sweet time.

When I told Kelly I was going to write about our garden harvest this month, she laughed outright. But there have been a few gems.

Cucumbers

I made my second batch of pickles tonight with a combined total of 6.25 lbs. of Bushy Pickling and Lemon cucumbers. The Lemon cucumbers were impersonators—they were in amongst the Bushy Pickling and had the wrong tag. I’m keeping my fingers crossed that they turn out alright as pickles.

Today’s cucumber and pepper harvest.

Serrano peppers

These sweet and spicy little peppers found a home in a few experimental jars of dill pickles. Kelly grows them to add to her Indian cooking and will dry any remaining at the end of the summer.

Dinosaur kale

We let one of our kale plants stick around this spring. It is still big and beautiful. The chickens, who were raised on kale (I suspect it’s a comfort food for them) positively adore a ration of Dinosaur kale with their daily treats. When I added it to a stir-fry, Kelly gave it more mixed reviews.

Jerusalem artichokes

They grow like weeds around the chicken coop. Kelly dug some out to clear the path recently and cooked them up as part of a quinoa salad. Delicious! I maintain that Jerusalem artichokes are one of the most under appreciated and utilized garden yums around.

Bartlett pears

Although the Comice produced a grand total of zero pears in its second year, the little Bartlett gave us seven beauties. We even managed to save them from the neighborhood squirrels, rats, and raccoons by picking them early and letting them ripen inside.

Golden Delicious apples

It’s not a great year for this apple tree, but I harvested 6.5 lbs. of apples a few days ago. The other producing apple tree (a mystery variety, perhaps Granny Smith?) is not ripe yet, but it has more fruit.

Figs

The centenarian fig tree’s fruit is starting to ripen. We picked the first figs tonight, and Kelly added them to a scrumptious baked apple, pear, fig, walnut, currant, and brandy concoction for which, tragically, there is no precise recipe.

Raspberries

The raspberries are just beginning to produce again. Think palmfuls, not basketsful of berries.

Grapes

Our first and only bunch of grapes this year was delicious. I suspect that its proximity to a beehive spared it consumption by birds and squirrels.

Eggs

The girls are keeping up egg production. Luma has missed two days of laying since the beginning of Jluy, and Petunia has missed three or four since the end of July.

Honey

I pulled two deep frames of honey from our superstar hive, Dave, at the beginning of August. We are due to make the rounds of the other hives and do more harvesting.

Wax

We melted down beeswax for the first time using our bee guild’s solar wax melter. We are now the proud owners of two slabs of wax that we will make into candles whenever we have time (ha!).

…With a penny for scale.

Looking toward a winter garden

With any luck we will start seeds for the winter garden in the greenhouse within the next few days. We are liking this minimized production, lower stress gardening (though Kelly misses larger quantities of produce), and are considering playing around with cover crops/bee food for the unused garden beds this winter.


Plum Plum Wine

Tightening the belt on plum guts.

For some reason, the woman who cuts my hair, Gail, offered me her entire Santa Rosa plum harvest this year. Not only did she offer it to me, she and her husband picked and bagged every last fruit on their tree last week and told me to come and get ’em. In five paper bags, the fruit weighed in at about 40-50 pounds. Daunted by Sarah’s recent jam-making marathon and upcoming vacations, we both eyed the bags on the kitchen floor and wondered who would make the first move.

I did. When Sarah lived in Aptos, one of her housemates, sculptor Richard Smith, left a bottle of plum wine on the dining table, and invited us to sample it. I did. It was delicious. Inspired by recent visits to a creative gastropub and the memory of Richard’s wine, I decided to make my first ever batch of homemade plum wine.

After doing some research online and becoming overwhelmed, I began an email correspondence with Richard, who has very graciously shared his process, tips, and equipment list. Whenever Sarah and I are about to attempt something new in the garden, especially things with which we have no experience, we always think of Richard and Tanya (his mate and companion). At one end of the spectrum, they represent the least fancy, yet most practical — and usually successful — approach to things, whether it be beekeeping or chicken-rearing.

So, armed with a 5-gallon food-grade plastic bucket and something more fancy than pantyhose (Richard’s method) that I bought at my local homebrew shop, I began juicing my plums last night, squeezing each plum into the net-like bag hung down into the bucket and belted in place, whooshing the mixture around by hand to force the juice out, and finally calling upon Sarah to hold a too-large bag of plum guts while I “milked” what juice and pulp fines (not a technical term) I could. It felt like an udder. The pulp fines were velvety. Richard commented on how sensual the experience is, and I agree.

Subsequent batches were smaller for manageability.

This morning, I continued juicing, or milking, as it were. This time, however, I juiced in smaller batches so that I could handle the guts without help and milk them myself. I ended up with four-gallons of juice, which will go into the freezer as soon as some beeswax and capped honeycomb is removed. We’ve had a bit of a wax moth invasion and are freezing everything-wax that we’ve been storing in our house.

When I return from vacation, I’ll thaw the plum juice, add the Campden tablets and get down to the business of making wine — the Richard way. Should be easier than what I’ve read online, and with any luck, will turn out equally delicious.

Canning with Doc Watson

Oodles of blueberries. What a delightful predicament!

Let me admit before we go further: I have a penchant for folk music. I also love to can, or at least, I love the results of canning and willfully forget how miserable the actual process often makes me. But good music, frequent taste tests, and the prospect of hoarding jam help ameliorate my suffering.

And so it was that I found myself in the kitchen a week ago with 36 dry pints of organic blueberries and a new Doc Watson CD blaring from my crotchety old stereo. The occasion? I found the blueberries on sale for a ridiculously good price, and Doc Watson died at the age of 89 in late May, prompting me to finally explore his music and adding to my general sense that the good, true things in the world are being rapidly lost.

Suffice to say, it’s now a week later, and I am finally wrapping up production and have listened to Doc’s masterful rendition of “Tennessee Stud” upwards of 30 times, subjecting Kelly and the immediate neighborhood to my own keening accompaniment.

There’s nothing quite like counting up your jars when the canning’s done. I am pleased to report that, with Doc’s help, I’ve canned a total of 22 half pint jars and 17 pint jars of the following jams: blueberry jam sweetened with our very own “heartbreak honey”, blueberry jam sweetened with sugar, blueberry/cherry jam, and blueberry/raspberry jam. In case anyone cares, this count doesn’t include the handful of jars that didn’t seal, and which I consumed by the spoonful, nor does it figure the few jars already gifted to friends and family. I feel rich.

Making Do and Making (Loquat) Jam

Kelly is everyone’s favorite around here. She is Pudy’s soul mate snuggler, and superstar provider of scrumptious treats to the chickens. Unfortunately for all of us, she is on vacation, basking on the sunny banks of the Sacramento River and enjoying the company of dear friends. We in the garden are happy for her, and we’re getting by for the most part.

Pudy lives with the consequences of avian infanticide

Pudy is under house arrest after successfully hunting a baby Bewick’s Wren this afternoon and dropping it dead at my feet. I suspect she also killed its sibling yesterday, and I’m unsure whether the poor parents have any children left in the nest.

Bird killer turned napper, Pudy is a good sport about her temporary confinement.

Treat-crazed chickens settle into outdoor living

The chickens are growing like weeds now that they have sunlight and room to run around. They come up hopefully each time I pass by, and I finally rewarded them this afternoon with a handful of the special treat mix Kelly made. It’s a blend of corn, flax, nutritional yeast (is that even good for chickens?!), and I don’t know what else. The girls go crazy for it.

Petunia is the braver and more curious of the two hens.

For the past three nights, the hens have been putting themselves to bed. As afternoon wears on, they watch for me from the corner of the run. If I come in to visit, Petunia flies up to my shoulders to hang out, while Lu paces around, tortured by indecision. She finds direct human contact distasteful and threatening, but she hates being left out.

Just before dusk, the girls dutifully head up the ramp into the coop and find spots to sleep on the roost. They are almost too adorable for me to bear, and I am so impressed by their grownup ways.

Sarah goes out on a culinary limb

Like the chickens, the weeds are also growing like weeds. I spent time this evening pulling them, along with overgrown beets, and shriveled carrots. I managed to get the ‘Sweet Meat’ squash planted, as well as my precious ‘Bushy Pickling’ cucumbers.

Then I ambled around to the front yard to see what trouble I could stir up. The loquat tree, which served as a great winter bee food source from December through February, is full of fruit. For the past week, I have watched a band of squirrels devouring the fuzzy yellow globes.

The neighborhood snack spot.

The night was young. I set up a ladder and climbed into the tree’s branches, a grocery bag tucked under my arm. I managed to harvest just over four lbs. of loquats. Turns out, this equals a little over two lbs. of edible fruit (thank you, fabulous hanging produce scale!).

What does anyone do with loquats besides eat them off the tree? I turned to my trusty laptop and found that some folks do indeed make loquat jam. I combined two recipes I found online. All told, it took me three hours to produce five little half pint jars of jam (it may end up more like a thick sauce).  I was particularly happy that every last jar sealed with a satisfying pop.

One of the five limited edition jars of loquat jam.

I’m exhausted, but undeniably pleased. I’ve always enjoyed the flavor of loquats, and from tonight’s spoon-lickings, I think the jam will be delicious. If Kelly’s lucky, I might even share some with her when she gets home.

For more loquat ideas and a detailed recipe check out our post, How to Make Loquat Liqueur.