Monthly Archives: March 2013

Easter in the Garden

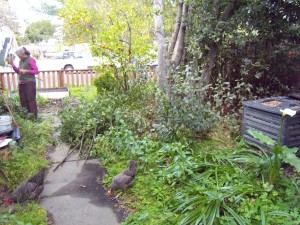
An Easter bouquet for the chickens.

An Easter bouquet for the chickens.

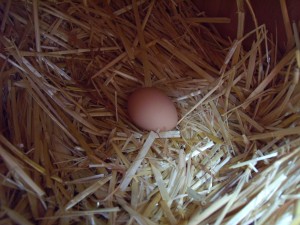
Our Easter egg.

Our Easter egg, courtesy of Luma.

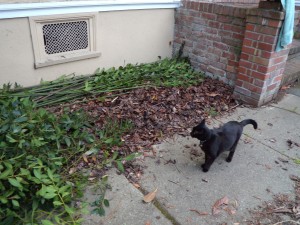
In view of our misbehaving creatures, Matt's new planting is now 'fenced'.

In view of our curious creatures, chickens and cat alike, Matt’s new planting is now ‘fenced.’


We began harvesting suckers today to use in weaving a small fence (and possibly a rocking chair(!). The girls were eager to help, and all went well until Luma managed to wedge her body between two fence slats. It looked grim at first, but Kelly was able to extricate her without sawing away any wood.

We began harvesting suckers today to use in weaving a small fence–and possibly a rocking chair(!). The girls were eager to help, and all went well until Luma managed to wedge her body between two fence slats. It looked grim at first, but Kelly was able to extricate her without sawing away any wood.

Pudy surveys the newly harvested poles. She is not a fan of change.

Pudy surveys the newly harvested poles. She is not a fan of change.


Sharing the Garden

I’ve never been much good at sharing, but Kelly and I recently decided to welcome a garden sub-letter of sorts to our little farmstead. Matt, our back-fence-neighbor, was on the hunt for gardening space. Specifically, he is eager to grow hops, kale, scarlet runner beans, and tea. How could we not get excited?
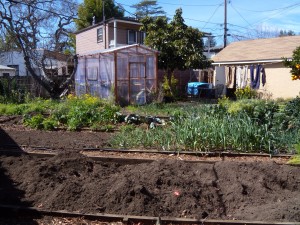
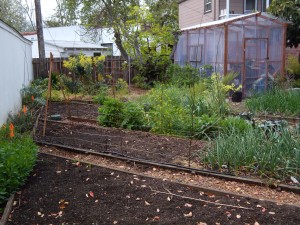
Matt’s new garden plot is the second open bed from the foreground.

In exchange for dirt, sunshine, water, and a corner of the greenhouse, Matt has agreed to put in five hours a month helping out with garden projects (translation: weeding Bermuda grass). We are thrilled to have him around. Since we are reclusive, uptight types, we have created an elaborate schedule for Matt’s gardening forays which takes into account his night shifts and our lazy mornings in pajamas. We trust it will all work out, and we are eternally grateful to him for putting up with our chickens’ egg-laying squawks during his sleeping hours. Matt, if you’re reading this, we are sooo appreciative of your flexibility and good humor.

The process of deciding to share our garden with another human has been an interesting one. We’ve considered the idea before and always shied away. Gardening is intimate and personal. The garden is where we meditate–unofficially, while pulling weeds—and where we find artistic expression. It offers comfort and solitude and the opportunity to connect with the natural world and to actively participate in it.

But gardening is also about community. It is an acknowledgment of our human needs for nourishment and our age-old connection with the landscapes we each call home, and with each other. We have a big garden (at least for two city dwellers) and Matt lives in an apartment with one north-facing balcony overlooking our chicken coop. The match seems preordained. Add to that that Matt is uncommonly polite, sensitive to our slightest prickle, and genuinely enthused at the prospect of training hops up onto his balcony railing.

Of course, we have always shared our garden. With the squirrels and raccoons. With the titmice and towhees. With the crimson throated hummingbirds and carpenter bees. Sometimes, in our quest to conquer weeds and tame shrubs, we forget these other residents. I have a thing for growing food and a tendency to turn up my nose at Kelly’s ornamentals and California natives.

Had I been born a few hundred years earlier and made the trek west across the United States, I strongly suspect that I would have worked with dedication to eradicate any native fauna that dared to compete for my crops or game and would have steadfastly worked to clear land of offending native flora. I’m not proud of this, I guess. It’s just that, on some level, I want so badly to survive that it seems like a crime not to utilize every inch of the garden for human life sustaining crops.

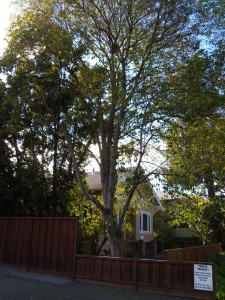
Which leads me to our latest dilemma. We’ve been lobbying the landlord for years to remove several weed trees in the front yard to allow us more room and light to plant interesting things. Now, suddenly, the gears are in motion and removal is set to start on April 2nd. Kelly came to me forlornly the other day and asked about the towhees. Don’t they love that spot in amongst the sick laurel’s suckers? Isn’t it shady and cool for them in summer? Might they nest there, hidden where we’ve never seen?
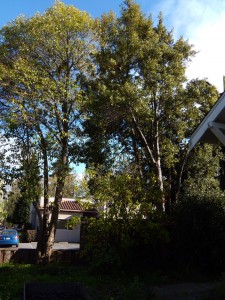
The two trees in question: privet on the left and laurel on the right. Apologies for the dark picture, but that's kind of the point.

The two trees in question: privet on the left and laurel on the right. Apologies for the dark picture, but that’s kind of the point.

We sat in the front yard for a long time and watched the sun move behind the laurel, the front yard destined to shadiness for the remainder of the day. I waded into the suckers and tried to really imagine the front yard without this towering tree. And of course, I felt guilty. We’re not the only ones counting on this garden for sustenance—in fact, we have far more options than our non-human neighbors.

Where will the towhees go if the tree comes down? Will the garden start to look like someone else’s? For all my efforts to mulch the weeds into nonexistence, I’ve realized in the past few days that my image of the garden includes large swaths of unruly weeds. I’ve never been intimately involved with an immaculate, well-kept garden—and maybe I don’t want to be.

Anything we plant in the space the laurel and privet now inhabit would ultimately provide habitat. We’ve talked about pomegranate and currants, lavender, artichokes, and redbuds. But the fact remains that wiping the slate clean will change our garden landscape and impact the lives of countless local critters on every scale.  How does one make a choice like that once one has become utterly bogged down with the inherent ethical questions? What, exactly, is a gardener’s place?
DSCN4638


DSCN4641

A Swarm and a Split

Arriving to inspect one of our hosted beehives this past Saturday, the host informed me that the bees had been more noisy that morning than she’d ever heard them. She went on to say that a football-sized group of them had been hanging off the front of the hive. Hmmm…

I looked around the yard in case the swarm had alighted somewhere near the ground. I saw no sign of the bees and proceeded with the inspection. Activity around the front of the hive looked normal enough, with a steady stream of bees going in and out. A few drones loafed around, but I didn’t see any worker bees fanning and milling at the entrance, as I have in other hives that have just swarmed.

Onsite equipment

–Eight-frame Langstroth (all deeps) with eight frames per box, three boxes total.

Hive lineage

–Swarm (probably from a feral colony) settled in a bait hive in an oak woodland habitat around May 14, 2012.

–Hived in Emerald Hills, CA.

–Swarmed and split March 23, 2013.

Untitled


On with the hive inspection

Opening the hive, I immediately found closed queen cells hanging from the bottoms and in the middle of frames in the third (uppermost) box. I found almost exclusively capped worker brood (no eggs or uncapped larvae, and minimal drone brood), quite a bit of honey, and very minimal pollen.

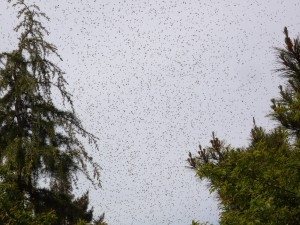
“I hear that noise again,” the host exclaimed. She had been sitting nearby to watch the excitement and provide moral support. I looked up and saw a cloud of bees rising above the neighbor’s yard. Egad! Swarming is such an awesome spectacle. We watched for several minutes as the bees moved toward us and then away, finally vanishing from sight behind a stand of trees. Honey bee swarms remind me of schools of airborne fish.

DSCN4610

Had I only gotten out to inspect a few hours earlier I might have easily collected them hanging off the front of the hive. Ah well…

Splitting the hive

Because we like these bees a whole lot (mild mannered, good honey producers, strong numbers), and because there were so many queen cells (8-10 in the top box?) and so many bees left in the hive, I decided to go ahead and split. Disclaimer: I don’t really know what I’m doing and hope the bees will forgive me my many foibles.

I figured I would attempt to approximate the configuration of our first hive split. I took two frames with queen cells, capped brood and honey, along with a frame mostly full of capped honey (some small amount uncapped) and the frame with the most pollen I could find (really only about one third of one side of the frame) and placed them in a new hive body. The frames had a decent number of bees on them, though they were not 100% covered. I also shook an additional frame of bees over the box. I’m a little worried about whether or not the split has enough bees and food to tide it over until more workers hatch out and allow the nurse bees to graduate to foragers. We’ll see.

I also wondered if, given that the original hive is presumably queenless after the swarm, foragers who ended up in the split might not be as motivated to jump ship and return to their mother hive. I don’t have an answer for this, or even a way to really tell when we go back to inspect.

I consolidated the remaining frames of brood in the original hive and added four new frames with foundation. I also took a peek in the second box. From what little I saw, it appeared to be more capped brood.

Kelly is out of commission with a hurt knee, and I’ve been roughing it alone on inspections. Lifting heavy boxes and retrieving tools solo has proved challenging, and I left the inspection at that. I will be back to add another box to the original hive soon, but we’ll wait to disturb the split for about a month. Here’s wishing them well.

Spring Hive Split

It’s that time of year again! Two out of three of the hives we inspected this past weekend had queen cells in some stage of development. After months of book learning, discussion with beekeeping friends, and formation of a new subgroup in our bee guild dedicated to gaining and disseminating knowledge of how to divide hives and raise queens locally (‘The Bee Selective’), Kelly and I finally made our first hive split.

We were fortunate to have Nickie, a beekeeping buddy, along who helped us muddle through (real life always varies from what you read in books). Following are the hive stats and details on how we made the split. Long live the queens!

What we started with: onsite equipment

–Ten-frame Langstroth (all deeps) with seven frames per box and follower boards, a la Serge Labesque, three boxes total.

Hive lineage

–Spring 2011 bee package purchased from Olivarez Honey Bees, originally hived in Redwood City, CA.

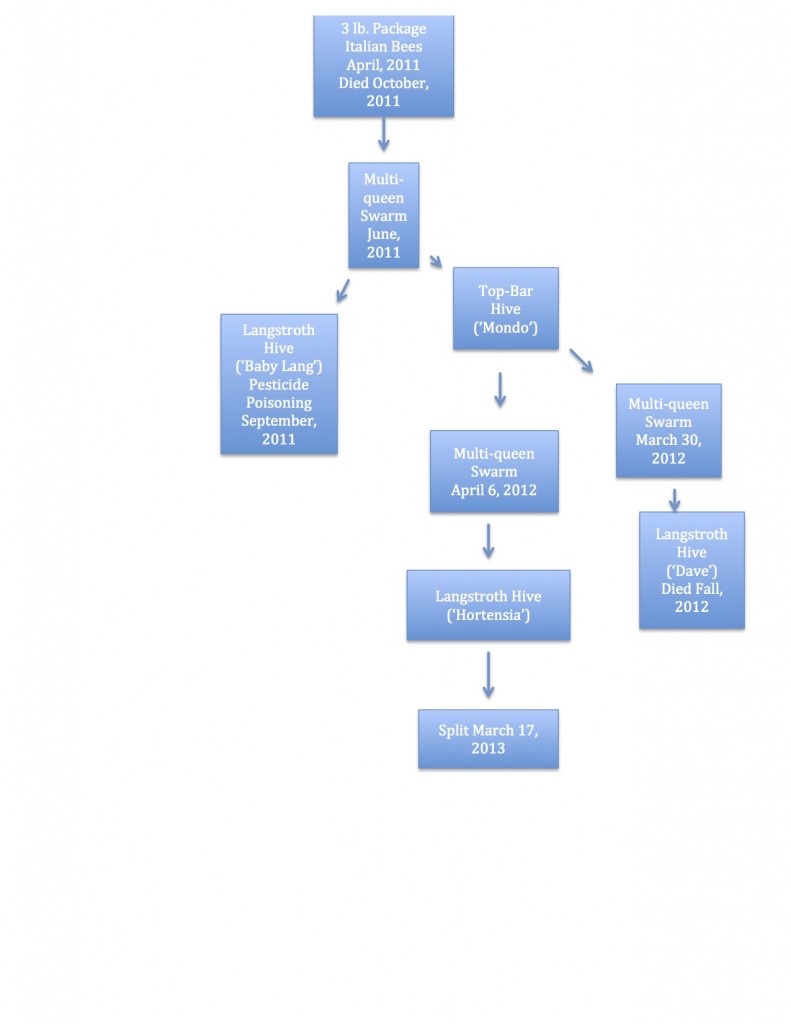
–Swarmed in June 2011 with multiple queens, and we hived two groups of bees (one in a Lang, one in a top-bar).

–The top-bar (still in Redwood City) lived through the winter and swarmed at least three times in March and April 2012. Again, all were multiple queen swarms (6-10+ queens per swarm).

–The bees we just split overwintered in San Mateo from one of those swarms. They were a small group last year, and we harvested no honey.

The bees' family tree.

The bees’ family tree.

Is that a queen in your pocket?

We began in the morning and soon discovered several closed queen cells at the bottoms of frames in the top (third) box. We also saw lots of drone brood, and some capped worker brood. We returned in the late afternoon with extra equipment to split the hive and proceeded to do a more in-depth inspection. We wanted to be sure that the queen cells were swarm cells, not supersedure cells to create an emergency replacement queen.

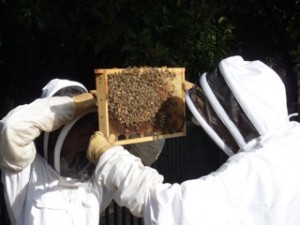
Examining a frame (photo by Nickie Irvine).

Examining a frame (photo by Nickie Irvine).

Though we never found the queen, we did find lots of eggs on one of the frames in the third box, as well as larvae, suggesting that a healthy queen has been laying since the worker bees made the queen cells. However, the frames predominantly held capped worker and drone brood (consistent with a hive that is preparing to swarm). We found many more queen cells, some of which were built between boxes and ripped open when we lifted boxes off to inspect below. We also were somewhat surprised to find brood in all three boxes. We would have expected the queen to be hanging out in the upper portion of the hive at this time of year. Clearly, the hive was congested.

Splitting the hive

We assembled a bottom board and one deep eight-frame box and selected four frames from the established hive. Two frames had queen cells and capped worker brood. The other two were predominantly honey (capped and uncapped) and pollen. All the frames were covered in bees, and we also shook bees from two other frames on top of the open box. We slapped on an inner cover and telescoping cover, and added an entrance reducer to the front of the hive so that this small group of bees has a smaller front door to guard.

Finally, we consolidated the brood and added replacement frames to the outer edges of the boxes. We also added an eighth frame to each box (because the bees had seemed cramped and an eighth frame fits easily with the follower boards in ten-frame equipment). We also added an extra deep box on top, bringing the total to four boxes.

Adding a box to the original hive. The split is in the foreground (photo by Nickie Irvine).

Adding a box to the original hive. The split is in the foreground (photo by Nickie Irvine).


We think we split too late to prevent swarming, but we decided to go forward with splitting the hive because of the longevity, honey production, and mellow nature of this lineage in our apiary. These bees aren’t taking any chances with queen rearing; Kelly thinks she counted 20-25 queen cells, though I would place the number somewhat lower.

We will keep you posted! In the meantime, enjoy the photos our beekeeping friend Nickie Irvine took.

Homemade Plum Wine Results

The prize.

The prize.

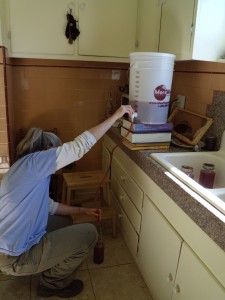
We finally bottled my plum wine a few weekends ago, and for a first batch, it was actually drinkable. Strong as hell, not the tastiest, full of room for improvement, but drinkable.

Strong as hell

I did two fermentations. Twenty-four hours after the campden tablets dissolved, I made a sugar solution in a quart jar with 2.25 pounds of sugar, 16 ounces warm water, and plum juice and stirred it into the juice in the bucket. I then made a yeast solution (with champagne yeast, recommended for fruit wines) and added that.

When the yeast activity slowed, about 12 days later, I transferred the liquid to a carboy, and did another fermentation with the same recipe of sugar solution. This means I added 4.5 pounds of sugar to 4 gallons of straight plum juice. The wine then sat for about 4 months in the carboy.

When I siphoned the stuff into the bucket for step one of the bottling process, just having it in my mouth gave me a gentle buzz. When I had a less-than-8 oz glass with dinner that night, the buzz did not seem alcoholic as much as it seemed other-drug-like. Relaxing and pleasant, nonetheless.

Not the tastiest

Sarah and I both have a sweet tooth, and this wine is sour. It has a nice fragrance and does not smell vinegary, but it is sour. We experimented by adding sugar to the desired sweetness. This made the wine more palatable, but if it weren’t homemade, I can’t honestly say I’d be drinking it. I sent a bottle off to Richard, my plum wine-making mentor, who prefaced his responding email, ‘DO NOT DUMP THIS WINE!’ He’s very positive. He thought the wine was too acidic, but has good color and is decent for a first attempt.

In the meantime, after we bottled it, I discovered all kinds of online literature that pointed to sweetening wine before bottling it, but cautioned that the yeast may undergo another round of activity. A home-brewing friend said champagne yeast is rather notorious for behaving this way and suggested sweetening after opening the bottle.

Full of room for improvement

1. I don’t even really like champagne or other dry wines. And the back-taste of champagne is quite present. I think I’ll research other suitable yeasts.

2. The plums weren’t necessarily ripe. The tree had been stripped clean, plum ready or not. I think I’ll opt for ripe fruit next time, or a bit overripe, or some combo.

3. Yes, I will add more sugar.

4. But I think I’ll taste-test more along the way, too. Doh!

5. Did I let the wine sit in its yeast debris too long? Maybe I should have siphoned it off, then let it sit. I remember Richard saying he strained before letting it sit for a few months.

Drinkable

It is. It has a great color and clarified nicely (an attribute of champagne yeast apparently). It isn’t horrible, it’s just not as good as it could be. I think I have 10 bottles. I used it to cook a pork roast one night. The more applications, the better, I think.

Cheers!

Pre-siphoning. The wine clarified nicely.

Pre-siphoning. The wine clarified nicely.

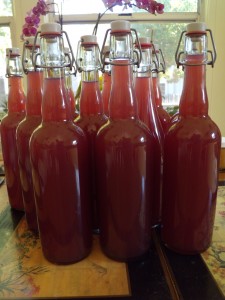
Bottling the wine after siphoning and filtering.

Bottling the wine after siphoning and filtering.

 We made improvements in our 2013 plum wine! Check out Homemade Plum Wine, 2013 for details. If you want to try making the best plum liqueur we’ve ever tasted, read up on Not-Traditional Umeshu.

Overall Gardener Takes to Twitter

Overall Gardener on Twitter??! Ack. I love to garden, and I love to write, but technology and social media are not really my strong suits. So it was with trepidation a year ago that I signed up for a Twitter account for the Overall Gardener blog. I believe I posted one tweet right away, before letting the account sit idly for over a year. What’s Twitter good for, anyway? I’m still not quite sure.

Clearly, I’m not doing a great job of selling you on my brilliant gardening tweets, but if you are brave of heart and not easily bored, stop by. I even figured out how to include a nifty button on the right-hand side of the blog which you can click in order to “follow” my tweets. And better yet, drop me a line and point me in the right direction. Until then, I will be roughing it alone with the handle, @OverallGardener. Yikes, I never thought it would come to this.

Spinach Pesto

Why wait for summer basil? I recently concocted a winter pesto recipe that I’m exceedingly fond of. Not only does it pack the flavor punch of traditional basil pesto, it makes me genuinely happy to eat raw spinach (and olive oil and Parmesan cheese, and nuts, and…!). I’ve taken to eating it on crackers, dolloped on sautéed chicken (sorry, girls), and mixed in with salads of various sorts.

But maybe the thing that pleases me most about my new spinach pesto recipe is that it allows me to use winter garden greens to create a wholly pleasing version of one of my favorite summer foods. Sure, I could drive to the store and buy some foreign-born basil to blend up a batch of pesto, but I can just as easily meander into the garden and repurpose an oft-maligned vegetable to create a delightful seasonal spinoff.

Without further ado:

6 large cloves of garlic

½-1 teaspoon salt (to taste)

1 cup olive oil

Juice from one juicy lemon

1 cup cashews or walnuts, chopped (unless you have an awesome blender)

1 cup Parmesan cheese

2 packed cups spinach, chopped

2 packed cups parsley, chopped


You know your own blender best. If it’s fabulous, simply crush the garlic with a garlic press and add to the blender or food processor along with all other ingredients. If, on the other hand, it’s anything like ours, you will have to chop the nuts and veggies first and add ingredients in small batches, blending as you go.

For the record, this recipe is almost equally tasty without the cheese. If lactose isn’t your friend, don’t hesitate to exclude the Parmesan. A final warning: this spinach pesto is very garlic-y. Modify as you see fit.

Asparagus: Long Term Commitment Gardening

You know you’re a real gardener when you grow edible plants you don’t even like to eat, just because they’re so darn cool.

Or maybe because your better half thinks they’re delicious.

Whatever the reason, I planted asparagus two years ago, digging in plenty of compost and carefully measuring the plant spacing (spacing plants evenly is not my strong suit, and without careful measuring I invariably fail). The one-year-old crowns, purchased at a local nursery, looked like little more than a few knobby roots when I tucked them into the ground.

But of course, they grew. Few non-gardeners recognize the plant outside of a kitchen. That’s because it looks so weird, and for most of the year it bears little resemblance to the elegant spears we eat.

First up in spring are the spears we recognize. Left to their own devices, these continue to grow, until the leaves (actually, modified stems called, ‘cladodes’) open. The overall effect is of a spectacular fern, though asparagus really belongs to the Asparagaceae family (while ferns belong to one of a number of Pteridophyta families).

Nevertheless, asparagus plants take on a distinctly ‘ferny’ appearance at the height of their growth and, being the glamorous sort, they top off the whole ensemble with bright red berries. No joke. The chickens were impressed too and incessantly eyeballed the small red globes in the sky last summer.

But if you want to do more than admire it, asparagus requires patience. As a long-lived perennial, it can produce for over twenty years, but woe betide the gardener who succumbs to gluttony and starts snapping spears before the plant reaches its third year. In this case, I’m told, the plant becomes stunted and weak, and the harvests never reach full potential. Asparagus needs to take its time and gather its strength, but if you’re patient, it will reward you with many years of tasty spears (if you like that sort of thing). Asparagus seems to be one of those foods that people either love or hate.

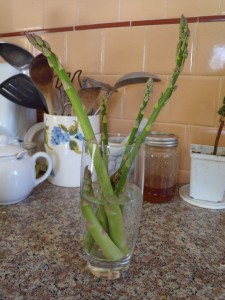
Now that I’ve convinced you of how striking the plant is and what an investment of time and effort the final, edible product represents, let me announce with great delight that Kelly conducted our first ever asparagus harvest today. The spears are a motley, mismatched crew, but they sure are cute! Our harvest should increase and improve as the asparagus season gets going. Maybe by the time it’s over I’ll have learned to like asparagus.

The first harvest!

The first harvest!