Category Archives: In the Kitchen

Late July/Early August, 2016: A long overdue report

While Sarah has her hands full in her new social work position, I’ve settled into a nice little groove here at home. Here’s a short – and very long overdue – report.

Garden

We’re having a cool summer, with temps mostly in the high 70s/low 80s, peppered by a few heat waves. Tomatoes planted in April are just now ripening, namely ‘Flamme,’ a French heirloom. Fruits are small to medium in size, about 3″, with orange skin and flesh, and are mild, but rich in flavor.

'Flamme' tomatoes.

‘Flamme’ tomatoes.

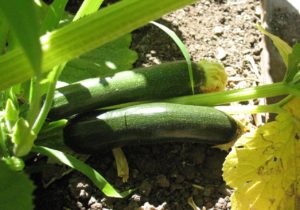
This is our second year growing ‘Black Beauty’ zucchini, another heirloom variety, and while it may not impress any summer squash aficianados, I’m liking it for two reasons: 1) the fruits are pleasantly flavorful and tender, even when large (12″), and 2) our consumption rate seems to dovetail with the plant’s production rate. No begging friends, family, neighbors, and total strangers to take zucchini; we harvest 2-3 fruit about every 3-4 days.

'Black Beauty' zucchini.

‘Black Beauty’ zucchini.

Contraptions built of PVC pipe and deer net/fence to protect the grapes and Bartlett pears from rats, squirrels and raccoons are working so far.

Bees 

We had one of our worst seasons of losses last fall and winter, coming into this spring with only two hives. Sarah did splits, and we acquired a new colony from a fellow beekeeper in order to diversify our genetics. We’re now up to five colonies. We harvested honey from dead-outs in the fall and spring, but haven’t harvested much since, and I imagine we won’t have much of a summer harvest either.

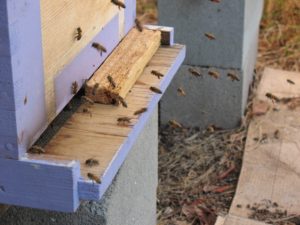
The 'newbees'.

The ‘newbees’.

Sadly, the specialty wine shop that carried our honey decided to close its doors after 130+ years of business. So, our relative slow pace of production hasn’t created any stressful consequences. In doing business with the wine shop, however, we entered the dark hole of business licensure and taxes. Unsurprisingly, we’re due to pay more in taxes than we will ever sell in honey or hive products. While we may have fantasized at one point about making a living keeping bees and selling hive products, we’ve long since realized that the scale of production necessary isn’t one we’re willing to pursue.

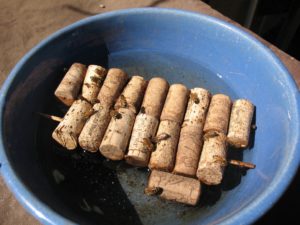
Simple bee-water system using wine corks pre-drilled and skewered.

Simple bee-water system using wine corks pre-drilled and skewered.

On the upside: five hives in two locations has made our beekeeping a little more manageable.

Canning

Our pantry dwindled while Sarah traveled and studied in Guatemala last summer, and gratefully, she’s been diligent in restocking it. She’s made apricot jam from farmer’s market fare, plum jam from our Santa Rosa tree, and pickles galore from our garden. We’re growing ‘Mini White’ and ‘County Fair’ pickling cukes, and have watered more frequently this summer to ward off bitterness. Both make a tasty pickle, with Mini White sweetening up a bit in either lacto-fermented or fresh-pack processes. We’ve decided we like the flavor of fresh-pack pickles better than lacto-fermented, but admittedly, we haven’t mastered the art of lacto-fermentation to a point of consistent results. Our lacto-fermented sauerkraut and cauliflower turned out well, but our pickles have been hit-or-miss.

Next up: white peach jam, courtesy of fruit from a client’s garden.

Brewing

 Sarah’s travels extended to Cuba last year, where she picked up honey from a few different sources. Her host Yaritza gifted her with two big rum bottles bought on the street. We suspect it had been thinned with water, since it began to ferment soon after Sarah returned home. Tragically, Yaritza was diagnosed with a brain tumor a few months later, and passed away after a surgery to remove it. In her honor, I hope, I made an orange mead, using ale yeast (Safale 05) for the first time.

Lately, I’ve been avoiding Campden tablets so as not to introduce unnecessary sulfites: instead, I gently heated the honey in water, bringing it to a near-boil, then letting it cool. I juiced the rest of the oranges and five Bearrs limes from our trees, which yielded about a gallon of juice. Raisins (a more natural alternative to yeast nutrient) and high-quality jasmine tea (to provide some tannins) rounded out the recipe. Since so many of my meads and melomels have seemed to need years of maturing, the inspiration to use ale yeast was to create a ready-to-drink mead. I still need to either rack it again, or go ahead and bottle it, so how ready it is remains to be seen.

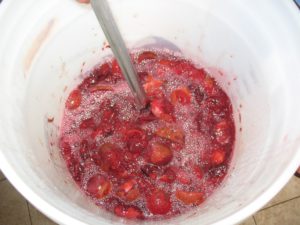
Yesterday, I started a plum wine. I’ve been trying to use fruit from the freezer, and had a few gallon ziplocks of whole Santa Rosa plums, along with two 1.25 liter bottles of plum juice. To that, I added a few pounds of cut-up Burbank plums, a sizeable sprig of tarragon and a 2″ length of cinnamon stick, along with about 4 lbs of white sugar and about 3 lbs of honey. I used a yeast I haven’t tried before: RP–15 Rockpile, a yeast isolated in Syrah-making described as emphasizing fruity flavors. It’s always fun to experiment, and I’ve been looking for a good yeast for my meads and melomels that isn’t a champagne yeast or derivative.

Stirring the plum wine mash.

Stirring the plum wine mash.

Sarah’s vinegar-making has filled our cupboard with red and white wine vinegars, so I also started making shrubs – another great way to use freezer fruit. The best to date were a blueberry shrub with red wine vinegar and a peach raspberry shrub with white wine vinegar.

From my internet perusing, the general rule of thumb for shrubs is 2 cups fruit: 1 cup sugar: 1 cup vinegar, but I have found I like a less sweet, more vinegary drink, so I add less sugar during the maceration period, then more vinegar to taste during the maturation or rest period. The process timeline varies according to different websites, for example, how long to macerate the fruit and sugar, as well as how long to steep the mixture in vinegar after maceration. Another variation includes whether to add vinegar to the sugar and fruit mixture or whether to add it to the strained syrup (from the fruit and sugar).

The ultimate difference might be in the health benefits rather than the flavor: no matter which process you use, the end result is a uniquely tasty, refreshing drink. If you’re using unpasteurized vinegar, like we do, I imagine the health benefits remain stable, but that’s just a guess. We didn’t intend to jump on the hipster shrub bandwagon here, we just had all the raw ingredients at hand, and plenty of them: fruit, sugar (honey) and vinegar.

Cheers!

Lessons in Vinegar Making

As I write this, five jars of red and white wine vinegar and their vinegar mothers sit in jars in the kitchen, working away. I grew all of the vinegar mothers from scratch last summer, experimenting with various mixtures of grape mash, water, sugar, and honey.

Last August, I wrote about the confusing and contradictory information on making homemade vinegar. I fretted over whether my batches of vinegar from store-bought mother and from scratch would turn out. Vinegar making seemed like a strange and complicated science experiment.

9 months later, I can say with conviction that vinegar is indeed a wild science-y miracle as, I suppose, are most culinary and propagation endeavors. But making vinegar is also pretty easy, requires little time on the human’s part, and produces fabulously tasty results.

Here are the most important lessons I’ve gleaned from my first 6+ rounds of vinegar:

  1. Fruit flies rock. I initially read conflicting opinions on the importance of allowing fruit flies to colonize the vinegar concoction when one is trying to raise a vinegar mother from scratch. Short answer: almost all of my jars of fruit, water, and sweetener quickly grew beautiful vinegar mothers in the presence of swarms of disgusting little fruit flies. The flies’ magic comes from the vinegar-making bacteria on their feet. Once you have a vinegar mother established, there’s no need to include fruit flies in the jar for future batches of vinegar.
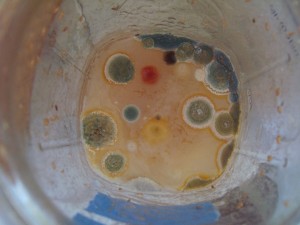
  2. Making white wine vinegar is harder than making red wine vinegar. Virtually all of my red wine vinegars taste amazing. Not so with the white wine vinegar. The mothers appear less robust, and the vinegar sometimes tastes a little ‘off’. Maybe I’m still acquiring my taste for the real deal? Since white wine is higher than red in naturally occurring sulfites, it’s more difficult for the Acetobacterium that turn wine into vinegar to flourish. I generally use wine that has no added sulfites for this reason, but have found that my vinegar mother readily turn ‘regular’ red wine into vinegar with no problem. Perhaps the subprime Acetobacterium conditions caused by the higher sulfites in white wine also explain why my white wine mothers have been more prone to molding. But more on that next…
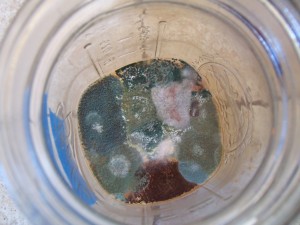
  3. Neglect your vinegar mothers too long, and they will mold. After bottling finished vinegar in December and feeding the mothers their wine/water mixture, I got busy and didn’t tend to the jars until mid-April. While the majority were still doing fine, some of the smaller jars of white wine vinegar had grown flamboyantly colorful mold patches and had to be thrown out.
  4. One of my biggest points of confusion when I started this project was how long it takes for the mother to turn the wine into vinegar. I now know that it takes about a month for a new layer of mother to form on top of the wine, indicating that the vinegar is ready for consumption. Timing definitely depends on the size of the mother in relation to the amount of liquid you add. It will take a small mother longer to digest the alcohol in a comparatively large amount of wine. However, once your mother has finished her first batch of wine in a given jar, she should be able to complete the next batch in the same sized jar in about a month.
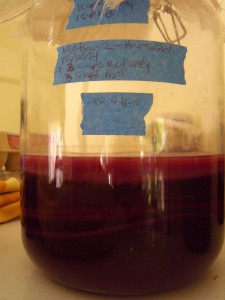
  5. Darkness isn’t required for vinegar mothers to do their thing. As with most of my projects, I’ve become lazier and relaxed my standards over time. In the beginning, I thought vinegar mothers needed total darkness to be happy. These days, my ladies live in glass jars on top of the refrigerator (for warmth), and I’ve scrapped trying to swaddle them in towels to keep them in the dark. They’re growing just fine.
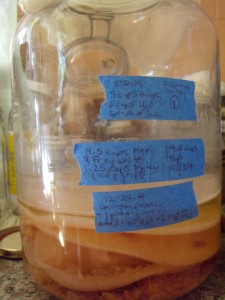
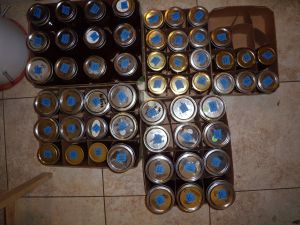
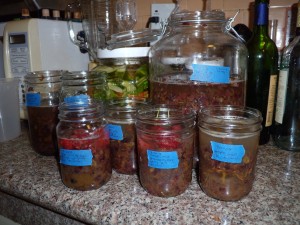
My happiest (and only remaining) white wine mother. I keep my 'vinegar records' written on painter's tape on the sides of the jars.

My happiest (and only remaining) white wine mother. I keep my ‘vinegar records’ written on painter’s tape on the sides of the jars.

DSCN0255

I love the layers of mother that build up in the jar over time. If I were in the business of maximizing my vinegar production, I would be diligently dividing these pieces of mother to start new production jars.

The white wine mothers produced the most interesting mold colors.

The white wine mothers produced the most interesting mold colors.

A few of the reds molded too.

A few of the reds molded too after months of neglect on my part.


Homemade Sauerkraut Results

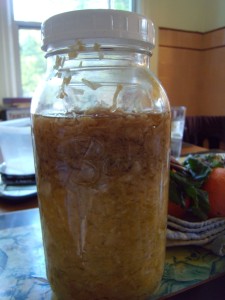
After almost four months of waiting, the New Year’s Eve half-gallon sauerkraut batch results are in. Drumroll, please….

Kelly proclaims the sauerkraut, ‘perfect,’ ‘fabulous,’ and ‘just the way sauerkraut should be.’ There is none of that is-it-my-imagination-or-is-this-slightly-rotten taste we experienced when we broke into the smaller spicy sauerkraut batch just a few weeks into January. I’ve picked up the same questionable flavor in most of the homemade krauts I’ve tasted that are less aged. Despite our trepidations, we ate the spicy kraut for a few weeks until Kelly decided it didn’t agree with her guts, and I began to feel queasy after indulging in my morning spoonfuls.

With this four-months-aged kraut, I do detect what might be described as a subtle fish tank flavor, but Kelly hasn’t picked up on it, and it’s really just aquatic tasting rather than fermented/rotten tasting.

Mostly, though, it’s satisfyingly sour, with a good crunch. The kraut toward the top of the jar is slightly discolored, but we can’t tell a taste difference between the top kraut and the stuff lower in the jar.

Secretly, I had all but given up on this batch of sauerkraut, eyeing its slightly browned contents with distrust. It had lived on the kitchen counter since New Year’s, in plain sight, but we had avoided actually opening it for a taste when the three-month mark recommended in the recipe came and went. Opening the air lock lid tonight, we were braced for disappointment.

Having finally tasted a mature sauerkraut, we’re now convinced we should be more patient with all of our lacto-fermented veggies.

With success still fresh, and being my annoyingly overenthusiastic self, I immediately suggested harvesting a few of the cabbages currently in residence outside and starting a new batch, but Kelly insists this half-gallon jar will last forever.

DSCN0216

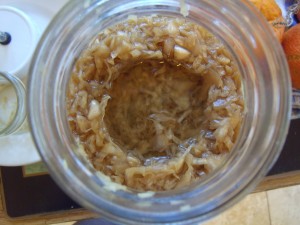
After taking out the little jar that had been weighing down the kraut...

After taking out the little jar that had been weighing down the kraut…

Experiments in Sauerkraut

We finally chopped up two batches of sauerkraut on New Year’s Eve. They’ve been sitting on the counter ever since, bubbling away and looking tasty.

In the end, we modified a recipe from a recently gifted cookbook, The Nourished Kitchen, by Jennifer McGruther. I’m always interested to read how long folks recommend letting fermented foods sit. McGruther suggests leaving the kraut for a minimum of six weeks before tasting and confides that she generally lets hers go for about three months.

When lacto-fermenting cauliflower pickles last year, I experienced the disappointment of letting a batch go too far for my taste. The resulting pickles were distinctly fermented and ‘gassy’ tasting with that special zing I associate with overripe or spoiled food.

I’m perplexed. I’ve read so many accounts of lacto-fermented foods bubbling away for weeks or months on end until they taste just right. These same recipes often recommend room temperatures of 65-70 degrees Fahrenheit. Our house is perpetually cold—usually in the 50s, so our pickles and kraut shouldn’t be fermenting extra quickly. The funky fermented taste that I can’t quite love seems to kick in by the end of the first week at the latest.

So what gives? Do I have terrible finicky taste in lacto-fermented foods? Is the funky zingy taste just a stage that I’m never patient enough to see through?

Blissfully unaware of the strict six-week timeline Kelly thought we were following for the sauerkraut, I opened up the airlock jars this week and took a taste. I should stop here and say we made two versions: a straight cabbage kraut a la the cookbook and a colorful kraut fashioned after our friend Tanya’s, but using the same cookbook’s base recipe–we love Tanya’s kraut, but she is out of communication on a foreign beach and unable to weigh in or provide her recipe.

In addition to cabbage, the colorful kraut features a few chopped cloves of garlic, grated ginger, and grated beet.

A week and a half into fermentation, and both krauts are distinctly funky to my palate. There’s no mold growing, and I have no reason to believe anything’s wrong other than my own impatience and/or poor taste.

Fingers crossed I didn’t introduce any bad bacteria by opening the jars. This time, we’ll give the kraut its time and hope that that does the trick.

Spicy SauerKraut Recipe

  • 5 lbs. cabbage, finely chopped
  • 2 tablespoons salt
  • 2 cloves garlic, finely chopped
  • 1 tablespoon beet, coarsely grated
  • 1 teaspoon ginger, grated

Directions

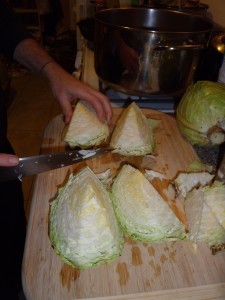
  • Quarter the cabbage, and then chop it very thin.
  • Place cabbage in a large bowl and add salt. Let it sit for five minutes.
  • Massage cabbage with salt for five additional minutes until the cabbage releases its juices (who knew a little salt would suck so much water out of a cabbage? This part was like a mad science experiment that caught us completely by surprise!)
  • Add remaining ingredients (if desired) and mix thoroughly.
  • Fill jar or crock with cabbage mixture, packing it down firmly as you go.
  • Pour any remaining juices from the bowl over the packed cabbage and place a small  jar or other weight on top of the kraut. This will help keep the cabbage from floating to the surface of the liquid. close the lid
  • Let sit for six weeks before tasting (or, if you’re like me, taste it a week in and see what’s really going on in there!)
  • Enjoy!

DSCN0484


DSCN0490

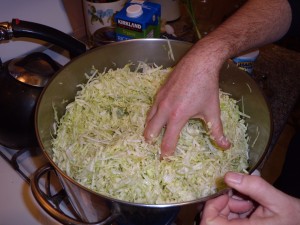
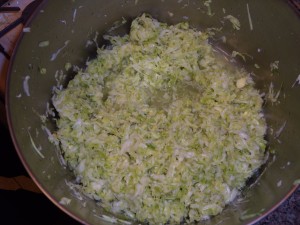
Look how much the cabbage shrinks after being kneaded with the salt!

Look how much the cabbage shrinks after being kneaded with the salt!

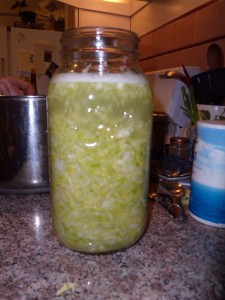
A canning funnel comes in handy when filling the jar with shredded cabbage.

A canning funnel comes in handy when filling the jar with shredded cabbage.

The cabbage supplies all its own water. Wow!

The cabbage supplies all its own water. Wow!

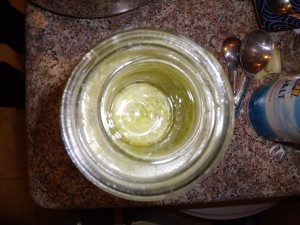
We used a small jar as a weight to keep the cabbage from floating to the surface of the liquid.

We used a small jar as a weight to keep the cabbage from floating to the surface of the liquid.

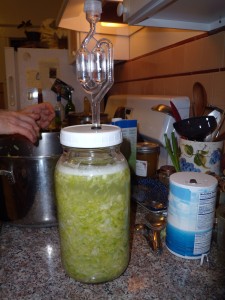
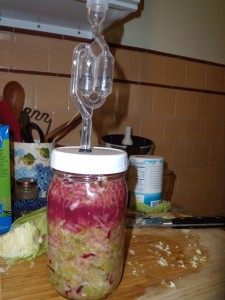
The airlock lid will let the cabbage gases escape, but keep bacteria from getting into the jar over the course of the fermentation.

The airlock lid will let the cabbage gases escape, but keep bacteria from getting into the jar over the course of the fermentation.

Here's to colorful, spicy kraut!

Here’s to colorful, spicy kraut!

December Harvest and 2014 Farm Stats

Happy New Year to you and your garden/farm/homestead/piece of earth!

It was a wonderful year for us in many ways, and we continue to believe that growing food really matters. We are grateful and feel energized to begin a productive new year and to continue learning and growing.

Here’s the December harvest scoop:

  • Asparagus ‘Farmer’s Favorite’: .13 lbs.
  • Basil ‘Aroma 1’: .06 lbs.
  • Butter lettuce: .75 lbs.
  • Cabbage ‘Parel’: 11.25 lbs.
  • Carrot ‘Nantaise’ (with tops): 1.5 lbs.
  • Eggs (Ameraucana 13; Welsummer 6): 20
  • Green onion ‘Purplette’: .86 lbs.
  • Kale ‘Wild Kale’: 1.6 lbs.
  • Kale ‘Winterbor’: 1.34 lbs.
  • Lemon ‘Meyer’: 3.25 lbs.
  • Lettuce ‘All-Season Romaine’: .06 lbs.
  • Mustard ‘Ruby Streaks’: .06 lbs.
  • Mustard ‘Tah Tsoi’: 1.31 lbs.
  • Navel orange: 23 lbs.
  • Parsley ‘Dark Green Italian Plain’: .25 lbs.
  • Persimmon ‘Fuyu’: 76.5 lbs.
  • Rosemary: .03 lbs.
  • Sage: .03 lbs.
  • Thyme: .03 lbs.

Total: 122.01 lbs.

2014 harvest total: 1073.13 lbs.

2014 egg count: 447 eggs

2014 growing stats and notes

Chickens:

In 2014, we doubled our small flock of chickens, welcoming a Welsummer and an Ameraucana chick in February.

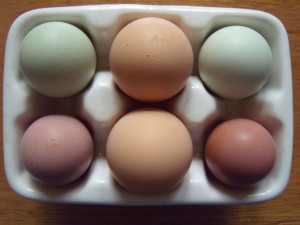
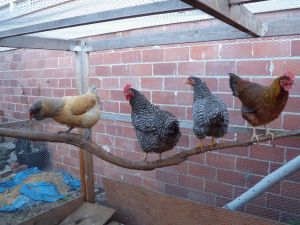
Many thanks to Petunia, Luma, Bell, and Fifi for last year’s 447 colorful eggs!

DSCN0665

DSCN0172

Bees:

In 2014, I resolved to ‘master’ honey bee hive division. A lofty goal that I can’t claim to have achieved. I did, however, perform a four-way walk away split on one of our best producing  hives, and all four successfully raised laying queens!

Although we lost our longest-lived colony in 2014, between my 100% success rate on hive divisions and collecting a local swarm from just a few blocks away, we maintained a seven colony apiary through the summer. So far (knocking on a hundred pieces of wood!), we haven’t had any hive losses this fall/winter. This is a record for us! We would be thrilled to make it through the winter with zero losses.

In 2014, we harvested 156.5 lbs. of extracted and comb honey–not a particularly impressive figure for seven colonies and due in large part to drought and to our conservative bee-robbing approach. Still, it was more than enough to give to friends and sell (for the first time!) at the county fair.

The bulk of this year's honey harvest bottled up by the quart, pint, and half-pint.

The bulk of this year’s honey harvest bottled up by the quart, pint, and half-pint.

loquat and bee

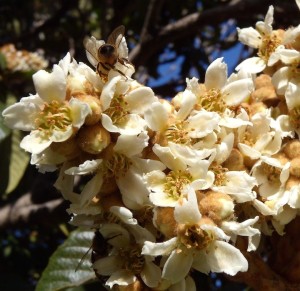
Bee butt in the loquat blossoms.

Harvest stats:

In 2014, our average monthly harvest was 89.4 lbs. Perennial crops made up 62% of the year’s harvest, while annual crops made up 38%. ‘Fuyu’ persimmons squeaked in a few pounds above ‘Hachiya’ persimmons to claim the title for largest harvest (151.75 lbs. to 147.2 lbs., respectively). The apple harvest was utterly abysmal, as were the asparagus, fig, zucchini (who ever heard of such a thing?!), and loquat harvests. The okra was a summer superstar, as were the eggplants, melons, and beans.

2014 projects:

In 2014, Kelly expanded her quest to install drip irrigation in all major beds. She also continued experimenting with olive curing, and with making liqueurs and fruit wines and melomels. Together, we dutifully weighed and recorded (most of) the harvest, vastly improving our garden record keeping. I grew my first vinegar mothers, and tried my hand at lacto-fermented vegetable pickles. We also opened a Little Free Library and seed exchange on the curb out front. I’ve stopped trying to count the books going in and out every day–there are just too many!

Many of our adventures last year didn’t make it onto the blog; unfortunately (or fortunately?), not every task involves pulling weeds and putting up produce, and often we run short on time when it comes to writing about our farm exploits.

Onward to 2015:

This year, we’ll grow more food.

Can we double our yield? Or triple it? I think so. I also know we will gripe and procrastinate. We’ll start seeds later than we intended, and then we’ll get starts into the ground even later. I will threaten no jam this year, and no pickles either. Kelly will say we have enough plum wine stored away to last a lifetime, and she’ll decide curing olives is too much work. She’ll decide to retire from beekeeping for the third year in a row.

Then the seasons will call to us. The plums will ripen and the bees will swarm, cucumbers the size of sour dough loaves will peer out at us from under wilted leaves. I’ll fire up the water bath canner and crank up the bluegrass music. Kelly will pound out more bee frames and set her olives to soak. We’ll get to work.

Home-Grown Vinegar

The homemade vinegar experiments have been sitting undisturbed in the darkest room in the house for almost three months. This is partly because it takes a while to make vinegar and partly (mostly) because I am really really busy with less interesting things.

I had an unexpected extra day off this past weekend and finally responded to the nagging voice in the back of my mind that’s been urging me to check up on the vinegar.

There’s bad news and good news. The bad news is that my store-bought white vinegar mother grew a nasty blue-green mold layer, as did three of my smaller jars of fruit scrap vinegar. I poked around briefly online and came to the conclusion that there’s no way to salvage a vinegar mother once she’s gone moldy. Bummer.

Because her gelatinous floating mass still seems perfectly alive, I’m having a hard time doing anything to actively dispose of her. A flush down the toilet seems vaguely cruel, as does tossing her into the compost pile. Instead, I’ve taken the passive route of putting her container in full sun on the back stoop–a move I guiltily suspect will also kill her. I never expected to get so emotionally invested in Acetobacter.

In the meantime, fabulous, magical, scientific things have happened in the other jars. In the largest jar of grape mash, a beautiful thick mat of vinegar mother formed on top of the grape skins and liquid. After I’d finished worshipping her, I tore this mother into multiple pieces and placed her in new jars with various concentrations of white and red wines. The experimentation continues!

A side view of the grape mash with a layer of vinegar mother at the top. You can see fruit flies stuck in the mother. See below for more on the role they play in the vinegar-making process.

A side view of the grape mash with a layer of vinegar mother at the top.

Vinegar mother--the view from above.

Vinegar mother–the view from above. You can see fruit flies stuck in the mother. See below for more on the role they play in the vinegar-making process.

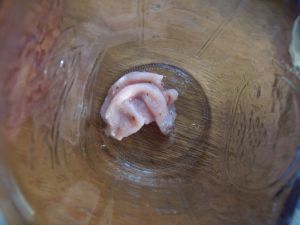
A piece of vinegar mother in a new jar.

A piece of vinegar mother in a new jar.

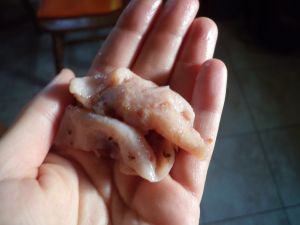
And up close, in my hand.

…And up close, in my hand.

The vinegar from this largest jar is delicious, very sour, with a complex flavor and a strawberry-lemonade hue.

The other three small jars of fruit scrap vinegar didn’t make mothers, but the liquid has definitely turned to vinegar. Maybe they need more time? Or maybe the liquid was a little too low? I added distilled water and wine to these jars as well and will wait with baited breath for new developments.

Grape mash vinegar mother recipe:

  • 5 cups mashed (juiced) grapes
  • 5 cups distilled water
  • A ‘splash’ of fresh grape juice
  • 2 spoons honey

Combine ingredients in a 1-gallon jar and leave uncovered for 24 hours. Then, use a rubber band to secure cheesecloth over the mouth of the jar and place in a dark warm room (my room honestly isn’t that warm, but I hear warmth is ideal for vinegar production). Leave untouched for about 3 months.

I made this recipe up, and the results were far beyond my expectations. I imagine any number of variations might also yield success.

Grape mash recipes that produced vinegar but no mothers (yet):

  • 1 cup grape mash
  • 1 cup distilled water
  • 1 cup honey

Notes: A pleasantly sweet and tangy vinegar

  • 1 cup grape mash
  • 1 cup distilled water
  • 1 cup white sugar

Notes: This one is a little too sweet for my taste, but definitely still vinegar-y

  • Unmeasured amount of grape mash (1 cup?)
  • Unmeasured grape juice (1 cup?)
  • unmeasured quantity of whole strawberries and raspberries (1/2 half cup?)
  • 1 tsp white sugar
  • Distilled water to cover

Notes: Very tasty, with berry flavors coming through

A note on fruit flies

I left my jars of grape mash uncovered for a day to allow fruit flies to get inside and jumpstart the process. From what I’ve read, fruit flies carry Acetobacter–the genus of bacteria that turns ethanol into acetic acid, or vinegar–on their feet and in their bodies, thus inoculating the mixture and increasing the chances that a good mother will form.

There’s no way around it: a jar of fermenting fruit with a captive cloud of fruit flies emitting a tiny buzzing sound beneath the cheesecloth cover is pretty disgusting. Even more gross is taking off the cheesecloth three months later and releasing a crowd of fruit flies—the great- great-grandkids of that first colony. Whatever works, though, you know? The vinegars in all of the non-moldy jars taste great and the mother was something to behold.

I’ll be interested to see the difference between the white and red wine batches I’ve started with pieces of vinegar mother, as well as whether the smaller jars will end up forming mothers of their own. The grape mash I used back in August was from Flame grapes, a table grape that Kelly assures me is neither a red, nor a white ‘wine grape’. Will the mothers have a wine preference? Stay tuned.

Homemade Vinegar From Scratch and From Vinegar Mothers

I’m making vinegar from scratch. I hear it’ll be delicious—the best vinegar I’ve ever tasted. But honestly, I don’t really know what I’m doing, and no one else seems to either.

It’s not that there aren’t zillions of blog posts out there with recipes for vinegar, not to mention how-to videos on You Tube. It’s just that everyone says—with a great deal of conviction—something different.

For instance, is small batch home vinegar ready in a week? Should you taste test for done-ness daily beginning at week three or four? Or does vinegar definitely take three to six months of undisturbed development? And likewise, does one casually add wine along the way to continue feeding the vinegar mother, or is it imperative to leave the whole concoction undisturbed for months on end?

How, exactly, does one know when one’s vinegar is ready for consumption? And, as one scans the froth anxiously for dreaded molds, how does one distinguish said molds from the healthy layer of scum created by a robust mother?

Then there is the question of what approach one takes to the vinegar making process.

Should I begin with a store-bought mother and some leftover wine? What about seeding fruit scraps with some unpasteurized commercial vinegar? Or growing a mother from wild bacteria by combining sugar (or honey?!) with water and fruit?

Are the corpses of fruit flies essential ingredients in the vinegar mother-making mix due to the bacteria on their feet, as one popular video claims? Or, as Kelly sagely pointed out, are the many local airborne bacteria and those naturally present on the skins of all fruits enough to inoculate the mixture?

All of these questions have made me hesitant to take the leap into the science experiment that is vinegar making. I’ve been perhaps unreasonably perturbed by the lack of clear, definitive, comprehensive instructions and explanations on the topic. But maybe, as I’m now trying to convince myself, the very wide array of information on home vinegar making simply indicates that there are many right ways to make vinegar. Here’s hoping.

In an attempt to increase my odds of turning out a favorable result, I made a variety of concoctions.

First, about a month ago, I started a batch of white wine vinegar using organic wine without added sulfites—apparently important so as not to impede the growth of vinegar-making bacteria—and a white wine vinegar mother, purchased for a pretty penny at the same boutique-y farm supply store at which I purchased my Perfect Pickler.

One month in, the white wine vinegar smells like vinegar, and the mother, a layered, fleshy looking mass, has grown considerably. Although it smells respectable enough, I haven’t touched or tasted it because the label on the mother’s bottle said it would take three to six months to become vinegar.


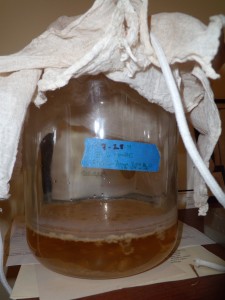
My white wine vinegar mother hard at work (the main gelatinous mass of mother is actually not visible in this picture. She is under the surface of the wine/vinegar).

My white wine vinegar mother hard at work (the main gelatinous mass of mother is actually not visible in this picture. She is under the surface of the wine/vinegar).

While my store-bought vinegar mother is busy digesting alcohol in semi-darkness, I’ve been considering trying to grow my own mother from whatever unseen bacteria abound in our neck of the woods.

Today, Kelly got busy juicing grapes to make mead, and I couldn’t resist taking a stab at grape pulp vinegar. Why not? There are plenty of recipes out there for apple and pear scrap vinegars.

Now, a few hours later, I’ve got seven jars of someday-fingers-crossed-delicious-vinegar on the kitchen counter. I’m especially excited to be experimenting with regard to proportions, sugar vs. honey vs. no added sweetener, etc. I even threw in a few strawberries and raspberries to some of the jars.

Vinegar galore--with pickles in the background.

Vinegar galore–with pickles in the background.

I have dutifully left the jars sans cheesecloth for the night, just in case fruit flies really are the key to successful vinegar.

Can one make vinegar without also making a mother? This is another of the many questions I still don’t have an answer to–some of the recipes I found don’t even mention a mother, while others require that one begin with a mother.

I’m hoping that mothers develop in at least some of these jars. Aside from their practical utility, there is something so otherworldly and deep-sea creature/disemboweled organs-grotesque about them. They’re revolting and magical all at the same time. And that name!


Carrot Greens, an Edible Love Story

DSCN0115What’s not to love? The feathery leaves and carrot-y green smell make me weak in the knees, but I’ve never actually cooked with carrot greens.

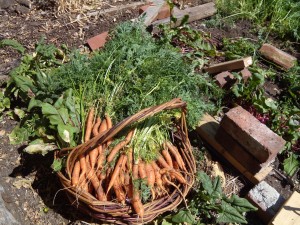
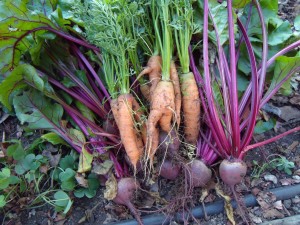
That all changed yesterday, when I harvested 11.75 lbs. of carrots and 5.75 lbs. of accompanying carrot tops. Our chickens disdain carrot greens and I found myself resisting the temptation to chuck the tops in the compost and get on with my day. Surely there must be a way to smuggle them into a recipe fit for human consumption? I poked around on the Internet and discovered that people all over the place love their carrot greens.

Carrot top pesto? Carrot green salads and slaws? Carrot green salsa? I have my work cut out for me in the kitchen.

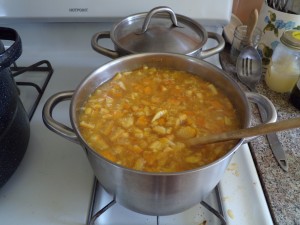
For starters, I made a batch of carrot soup. No recipe to go by, just a whole lot of carrots and other goodies from the garden. The soup has received rave reviews, so I’ll share the recipe I jotted down.

It has a rich flavor and a stick-to-your-bones feeling. Someone blind tasting it guessed that it had lentils in it—and it was hard to convince her that this soup is carrot through and through. I’m not sure how to say this, but it also tastes kind of fancy. As in, not something I threw together in my kitchen without a recipe. I take no credit; blame it all on the awesomeness that is carrot greens (and maybe also on the butter?!). Whatever it is, I’m sold on this soup.

Before we get to the recipe, a quick note on carrot greens. This is a widely misunderstood garden food, and people sometimes claim it is poisonous. Not true! I won’t go into the details here, but there is plenty of information out there debunking the poisonous carrot greens myths.

On the contrary, carrot greens are edible and also really good for you. They are high in many nutrients, including potassium, vitamin K, and magnesium.

Carrot Green Soup recipe

A caveat: I don’t believe in hard and fast recipes. I used what we had in the garden and kitchen and what seemed right. I hope you will too. And I hope you’ll leave a comment if you make an improvement on the recipe.

Ingredients

  • 3 tbsp. olive oil
  • 3.5 tbsp. unsalted butter
  • 3 small onions
  • 7 small garlic cloves, chopped small, or pressed
  • 1-2 cubes of bouillon (I used 2, but 1 probably would have been sufficient)
  • .25-.5 tsp. green coriander, chopped
  • 2 mint leaves, finely chopped (more mint might be even better)
  • 1.5 lbs. carrots, chopped small
  • 4 cups carrot tops, cut small
  • 1 cup beet greens, chopped
  • Juice from one Meyer lemon (big and juicy!)
  • 4 cups chicken stock
  • 2 tbsp. chives, finely chopped

Directions

  • Heat olive oil and butter in a large pot
  • Add onions and garlic, and cook over medium heat, stirring often
  • Add bouillon, green coriander, and mint to pot and stir until bouillon is broken down
  • When onions and garlic are cooked, add chopped carrots, and carrot and beet greens, stirring frequently
  • Add chicken stock and lemon juice
  • Simmer until carrots are well cooked
  • Let cool, then blend batches in the blender
  • Garnish with chopped chives and mint leaves
  • Enjoy!

March Garden Harvest

If only orange season lasted longer. The tree is bare, save for a last few remaining oranges.  We feasted on orange juice for the first half of March and sipped sparingly in the second half. Spinach parsley pesto was a huge hit this month, and I made three batches. The loquats are in full swing, but we have yet to get our loquat liqueur started. The chickens’ egg production picked up, while the asparagus yield remained disappointingly low.
Onward to more carrots, beets, and peas in April. We also have a second round of cabbage, cauliflower, and broccoli in the ground.
March harvest totals
  • Asparagus ‘Farmer’s Favorite’: 1.69 lbs
  • Beets ‘Pacemaker III Hybrid’: 3.25 lbs
  • Broccoli ‘Rudolph’: .5 lbs
  • Broccoli ‘Umpqua’: .25 lbs
  • Cabbage ‘Copenhagen’: 4 lbs
  • Cabbage ‘Parel’: 2.5 lbs
  • Carrot ‘Nantes’: 2.13 lbs
  • Cauliflower ‘Snow Crown’: 1.5 lbs
  • Chard ‘Fordham Hook’: 2 lbs
  • Chard ‘Rainbow’: 2.5 lbs
  • Chives: .06 lbs
  • Cilantro: .5 lbs
  • Dinosaur Kale ‘Niro di Toscano’: .31 lbs
  • Eggs: 42 (Barred Rock 24; Barred Leghorn 18)
  • Fava bean ‘Superaguadulce Morocco’: 4 lbs
  • Fennel ‘Perfection’: 3.13 lbs
  • Kale ‘Winterbor’: 1.75 lbs
  • Kale ‘Wild Kale Blend’: .75 lbs
  • Lettuce ‘Heirloom Blend’: .88 lbs
  • Lime ‘Bearrs’: 5.75 lbs
  • Loquat: 5.75 lbs
  • Mustard ‘Ruby Streaks’: .06 lbs
  • Navel oranges: 48.88 lbs
  • Parsley ‘Dark Green Italian Plain’: 1.16 lbs
  • Spinach ‘Donkey’: 2.28 lbs
  • Snow pea ‘Oregon Sugar Pod II’: 4.88 lbs
  • Snap pea  ‘Sugar Snap’: 3.5 lbs
  • Spring onion ‘Purplette’: 3.25 lbs
  • Thyme: 1 sprig
  • White sage: 1.5 lbs

March harvest total: 108.71

2014 harvest total: 201.01 lbs

DSCN0022

Homemade Honey Orange Marmalade

When we began harvesting navel oranges in earnest last month, I canned orange marmalade for the first time. The recipe is from our third edition copy of Stocking Up (1986), by Carol Hupping and the staff of the Rodale Food Center.

I was drawn to this recipe for its simplicity. Of the four ingredients, only the water wasn’t ‘local’ (i.e. from our own garden). The book calls it Bitter Orange Marmalade, and it is indeed quite bitter due to the inclusion of all of the fruit peel in the recipe. Maybe next year I’ll try a more traditional, sugary marmalade recipe, but overall I’m pleased with this one.

As I’ve mentioned before, I always hesitate somewhat to share recipes for canned goods. Please proceed at your own risk, and read up on canning safety at the website for the National Center for Home Food Preservation. The USDA offers a Complete Guide to Home Canning there. You can read about botulism on the CDC website. If you don’t feel comfortable canning, or have safety concerns, you can always make recipes to freeze or store short-term in the refrigerator.

Marmalade ingredients

  • 5 oranges
  • 2 lemons (I used Bearrs limes)
  • 3 cups honey
  • 12 cups water

Directions

  • Measure water into a large pot and add whole oranges and lemons or limes
  • Bring to a boil, then reduce to a simmer and cook for two hours
  • Saving remaining water, remove fruit, quarter it, and remove seeds
  • Chop fruit and return it to water
  • Bring fruit mixtures to a boil and add honey
  • Return mixture to a rolling boil and stir constantly for 15-30 minutes, or until the mixture has the consistency of a thick syrup (I had to stir and boil for about 45 minutes)
  • Leaving ¼ inch head space, pour marmalade into scalded half-pint jars and process for 10 minutes in a boiling water bath
  • Let the marmalade ‘age’ for at least two weeks before digging in

Enjoy! After dutifully waiting the recommended two weeks, we popped a jar open and started snarfing. I’ve been eating orange lime marmalade by the spoonful!

Yum!

Yum!