Author Archives: Kelly

Late July/Early August, 2016: A long overdue report

While Sarah has her hands full in her new social work position, I’ve settled into a nice little groove here at home. Here’s a short – and very long overdue – report.

Garden

We’re having a cool summer, with temps mostly in the high 70s/low 80s, peppered by a few heat waves. Tomatoes planted in April are just now ripening, namely ‘Flamme,’ a French heirloom. Fruits are small to medium in size, about 3″, with orange skin and flesh, and are mild, but rich in flavor.

'Flamme' tomatoes.

‘Flamme’ tomatoes.

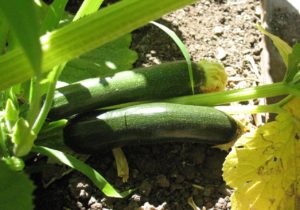
This is our second year growing ‘Black Beauty’ zucchini, another heirloom variety, and while it may not impress any summer squash aficianados, I’m liking it for two reasons: 1) the fruits are pleasantly flavorful and tender, even when large (12″), and 2) our consumption rate seems to dovetail with the plant’s production rate. No begging friends, family, neighbors, and total strangers to take zucchini; we harvest 2-3 fruit about every 3-4 days.

'Black Beauty' zucchini.

‘Black Beauty’ zucchini.

Contraptions built of PVC pipe and deer net/fence to protect the grapes and Bartlett pears from rats, squirrels and raccoons are working so far.

Bees 

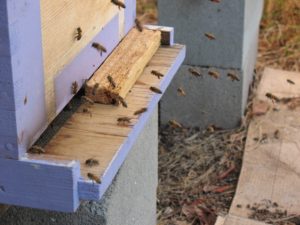
We had one of our worst seasons of losses last fall and winter, coming into this spring with only two hives. Sarah did splits, and we acquired a new colony from a fellow beekeeper in order to diversify our genetics. We’re now up to five colonies. We harvested honey from dead-outs in the fall and spring, but haven’t harvested much since, and I imagine we won’t have much of a summer harvest either.

The 'newbees'.

The ‘newbees’.

Sadly, the specialty wine shop that carried our honey decided to close its doors after 130+ years of business. So, our relative slow pace of production hasn’t created any stressful consequences. In doing business with the wine shop, however, we entered the dark hole of business licensure and taxes. Unsurprisingly, we’re due to pay more in taxes than we will ever sell in honey or hive products. While we may have fantasized at one point about making a living keeping bees and selling hive products, we’ve long since realized that the scale of production necessary isn’t one we’re willing to pursue.

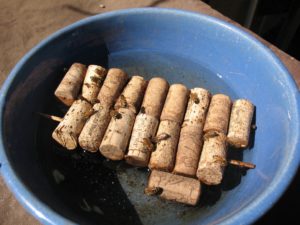
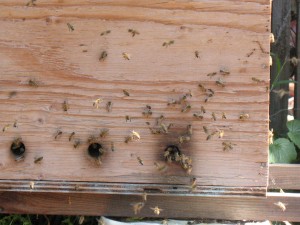
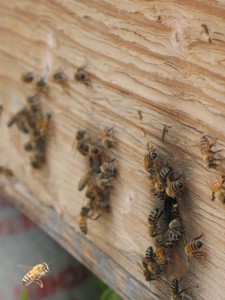
Simple bee-water system using wine corks pre-drilled and skewered.

Simple bee-water system using wine corks pre-drilled and skewered.

On the upside: five hives in two locations has made our beekeeping a little more manageable.

Canning

Our pantry dwindled while Sarah traveled and studied in Guatemala last summer, and gratefully, she’s been diligent in restocking it. She’s made apricot jam from farmer’s market fare, plum jam from our Santa Rosa tree, and pickles galore from our garden. We’re growing ‘Mini White’ and ‘County Fair’ pickling cukes, and have watered more frequently this summer to ward off bitterness. Both make a tasty pickle, with Mini White sweetening up a bit in either lacto-fermented or fresh-pack processes. We’ve decided we like the flavor of fresh-pack pickles better than lacto-fermented, but admittedly, we haven’t mastered the art of lacto-fermentation to a point of consistent results. Our lacto-fermented sauerkraut and cauliflower turned out well, but our pickles have been hit-or-miss.

Next up: white peach jam, courtesy of fruit from a client’s garden.

Brewing

 Sarah’s travels extended to Cuba last year, where she picked up honey from a few different sources. Her host Yaritza gifted her with two big rum bottles bought on the street. We suspect it had been thinned with water, since it began to ferment soon after Sarah returned home. Tragically, Yaritza was diagnosed with a brain tumor a few months later, and passed away after a surgery to remove it. In her honor, I hope, I made an orange mead, using ale yeast (Safale 05) for the first time.

Lately, I’ve been avoiding Campden tablets so as not to introduce unnecessary sulfites: instead, I gently heated the honey in water, bringing it to a near-boil, then letting it cool. I juiced the rest of the oranges and five Bearrs limes from our trees, which yielded about a gallon of juice. Raisins (a more natural alternative to yeast nutrient) and high-quality jasmine tea (to provide some tannins) rounded out the recipe. Since so many of my meads and melomels have seemed to need years of maturing, the inspiration to use ale yeast was to create a ready-to-drink mead. I still need to either rack it again, or go ahead and bottle it, so how ready it is remains to be seen.

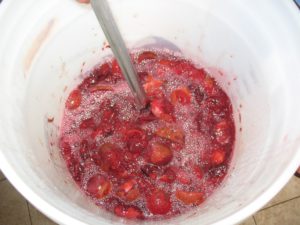
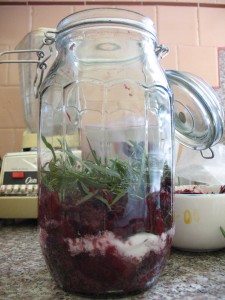
Yesterday, I started a plum wine. I’ve been trying to use fruit from the freezer, and had a few gallon ziplocks of whole Santa Rosa plums, along with two 1.25 liter bottles of plum juice. To that, I added a few pounds of cut-up Burbank plums, a sizeable sprig of tarragon and a 2″ length of cinnamon stick, along with about 4 lbs of white sugar and about 3 lbs of honey. I used a yeast I haven’t tried before: RP–15 Rockpile, a yeast isolated in Syrah-making described as emphasizing fruity flavors. It’s always fun to experiment, and I’ve been looking for a good yeast for my meads and melomels that isn’t a champagne yeast or derivative.

Stirring the plum wine mash.

Stirring the plum wine mash.

Sarah’s vinegar-making has filled our cupboard with red and white wine vinegars, so I also started making shrubs – another great way to use freezer fruit. The best to date were a blueberry shrub with red wine vinegar and a peach raspberry shrub with white wine vinegar.

From my internet perusing, the general rule of thumb for shrubs is 2 cups fruit: 1 cup sugar: 1 cup vinegar, but I have found I like a less sweet, more vinegary drink, so I add less sugar during the maceration period, then more vinegar to taste during the maturation or rest period. The process timeline varies according to different websites, for example, how long to macerate the fruit and sugar, as well as how long to steep the mixture in vinegar after maceration. Another variation includes whether to add vinegar to the sugar and fruit mixture or whether to add it to the strained syrup (from the fruit and sugar).

The ultimate difference might be in the health benefits rather than the flavor: no matter which process you use, the end result is a uniquely tasty, refreshing drink. If you’re using unpasteurized vinegar, like we do, I imagine the health benefits remain stable, but that’s just a guess. We didn’t intend to jump on the hipster shrub bandwagon here, we just had all the raw ingredients at hand, and plenty of them: fruit, sugar (honey) and vinegar.

Cheers!

How to Make Loquat Liqueur

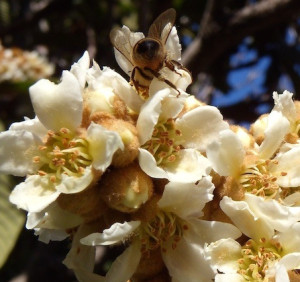
Honey bees love loquat blossom nectar as a winter food source.

Honey bees love loquat blossom nectar as a winter food source.

Our loquat harvest was incredibly small last summer, and something special seemed to be required. Rather than make loquat jam with so little fruit, I made liqueur this year, using the entire harvest – 4 1/3 pounds of fruit.

Liqueur making takes patience and it felt a long way from summer when I finally bottled the loquat liqueur this chilly morning. Small though my sips were, I can say it’s one of my favorite liqueurs that we’ve made so far. The flavor is subtle, but sweet and well-rounded.

I’ve started using shochu, or Japanese vodka, for most of my liqueurs. It doesn’t have the alcoholic punch of vodka (it’s 48 proof, compared to 80 proof vodka), and its very slight sweetness makes it compatible with most fruit. Read on for my original recipe and notes.

Loquat Liqueur ingredients

• 4 1/3 pounds loquats, washed, flower end removed, halved and pitted to yield 2 pounds of fruit

• 1 cup sugar

• 1 large handful of green coriander sprigs

• 1 750ml bottle shochu

Loquat Liqueur directions

1. Put fruit, sugar and coriander sprigs in jar and add shochu. Shake until sugar is dissolved.

2. Store in a cool, dark place, and continue to shake occasionally over 6 months. Discoloration of the fruit is normal, but watch for mold (I didn’t have any problem).

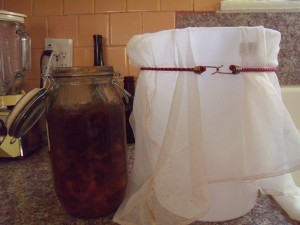
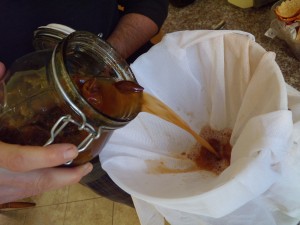
3. After 6 months, secure cheesecloth to a container, and strain liqueur through cheesecloth. Allow fruit solids to sit in cheesecloth overnight.

4. In morning, remove cheesecloth and gently squeeze into the container.

5. Bottle liqueur.

Additional tips for homemade liqueur

1. In my original recipe, I used a medium handful of green coriander sprigs (cilantro plants gone to seed, before seed dries). I’ve increased the measurement here because I can’t really taste the coriander in the liqueur, and I’d like to. Next year, I’ll increase the amount of coriander. You can leave out the coriander, or substitute a different spice or herb.

2. I actually used one bottle of shochu plus about 1/8 of another bottle, which was leftover from some other liqueur project. Obviously, you can adjust the quantity of shochu and sugar, depending on how much loquat fruit you have on hand. When I first started making liqueurs, I aimed for a 2:1 ratio of fruit to sugar (by weight). I’ve since been experimenting with less sugar, and with honey also. I then add alcohol to fill whatever jar I am using.

3. Be sure the lid to the jar has a good seal. If it doesn’t, add plastic wrap on the inside of the band before closing. This helps prevent mold, though it isn’t common for mold to form in the presence of alcohol.

4. You can use cheesecloth or any similar type of cloth or bag to strain the finished liqueur. The tighter the weave, the better: this helps strain out the sediment.

5. I let my liqueurs steep for six months. When I made my very first plum liqueur, the recipe called for six months. The results were awesome. I’ve followed this timeframe ever since. You might be able to subtract some of this time for other fruits, but I wouldn’t with loquats. They have a very subtle flavor, and the timing allows for maximum flavor extraction.

Just before straining.

Just before straining.

DSCN0014

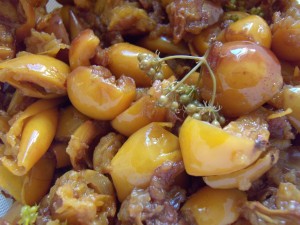
This is what loquats and coriander look like after six months in shochu.

Loquats and coriander after six months in shochu. We usually discard the fruit after straining.

 We make lots of other yummy home alcohols, and you can too! For instructions on how to make plum wine, check out our post, Homemade Plum Wine Results; for additional tips and tricks (this year’s batch is based on that first recipe, but is turning out much tastier!) check out Homemade Plum Wine, 2013; to learn about the hands-down yummiest plum liqueur on the face of the earth, take a look at Not-Traditional Umeshu.  

Home-Cured Olives, Step by Step

I drove north in mid-October to visit dear friends and to harvest olives. I was actually a little late. Many of the olives in the surrounding towns had already turned black, but I was lucky to find a few pockets of green olives on my friends’ trees.

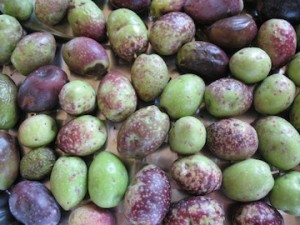
For lye curing, green olives work best. Those that have started to turn, with patches of grey or yellow-green, or those that are grey-green, work well also. The blacker the olive, the more ripe it is, and the more likely it is to fall apart during a lye treatment.

This is my third year curing olives, and my second using lye. The first year, I couldn’t find lye locally, so I tried the dry salt curing method. It took well over 3 months, many of the olives rotted, and the final results were quite intense. The flavor of the olives was extremely concentrated, and for me, unpalatable.

Last year, I wised up and bought lye in olive country, at the local hardware store, before heading home. The store had a huge end-cap display. As I approached, the friendly sales guy said, ‘Ah, curing olives?’

A note about lye: It is a caustic chemical, and can burn skin and eyes on contact. Follow directions about handling and disposing exactly. And while it’s the active ingredient in Drano, it’s not the only ingredient. If you can’t find lye, do not use Drano to cure olives.

I’ve been working with a very old Extension recipe for home-cured olives and decided to see if it had been updated. It had, and it had been greatly expanded, too (see new recipe here) (Note: This link appears to be unstable. Keep trying if you get gobblety-gook; it should work at some point!)

Here’s my 21-step process, recipe and tips included. Thanks to Sarah for her marvelous editing, breaking down the process to make the instructions very clear and easy to follow.

Sorting the olives

1. Cull any bruised, mushy or otherwise subpar olives. For home-curing, olives mildly affected by olive fruit fly are fine. According to UC Davis, a bad infestation will cause your fruit to rot, so curing right after harvest may impede rotting. I found about 1/5 of last year’s harvest affected, and I culled the most damaged olives. I discovered, however, that one or two holes left by larvae on less damaged olives allowed for quicker penetration of the lye, so this year, I left them. These olives turn out softer, which I like. You may also need to sort olives by size, since olives of differing sizes will absorb the lye at different rates. My olives were all the same variety and pretty much the same size.

Culled olives. One of the trees had a heavy scale infestation, which you can see, as little specks on the olives. Other olives were wrinkled, dark, or had sunken spots.

Culled olives. One of the trees had a heavy scale infestation, which you can see as little orange specks on the olives (click on picture to enlarge). Other olives were wrinkled, dark, or had sunken spots.

Olive lye soaks, step-by-step

2. Transfer to a container with a built-in spigot, like a cooler or a brewing bucket. The container should be food-grade plastic.

3. Use a quart jar or gallon jug to begin filling the bucket with enough water to cover the olives by an inch or so. Keep track of how much water you’ve used to fill. This amount determines how much lye you use (and later, how much salt).

Olives covered in water in brewing bucket. Ready for round one of lye.

Olives covered in water in brewing bucket, ready for round one of lye.

4. When you determine how much water will cover the olives by a few inches, reserve some of the water to make your lye solution. For example, I used 7 quarts of water, estimating that one more quart was needed to cover the olives. So, I reserved one quart to mix the lye. To mix the lye, I wore gloves, long sleeves, pants, and a bandana wrapped around my nose and mouth.

5. I used granular lye at the rate of 3 TBS per gallon. Since 8 quarts equal 2 gallons, I mixed 6 TBS of lye into the quart jar of water. Be sure to stir gently to dissolve the lye, and be careful of the fumes created by mixing.

6. Add the lye solution to the olives slowly. Then stir everything gently (to mix, and to avoid splashing) with a stainless steel or wooden spoon.

7. Let the olives sit for 12 hours, stirring every two hours or so.

8. At the end of 12 hours, drain off the lye. I do this in the sink, running cold water the whole time it drains. I also wear my protective gear, as described above.

9. Fish out a few large olives with your stainless steel or wooden spoon and rinse under cold water. Test for lye penetration by cutting a segment of the olive away with a knife. When lye has penetrated to the pit, the flesh should be yellowish green all the way through. In my test olives, the flesh around the pits was still whitish and milky. This meant the olives needed another round of lye.

10. Again, fill olive container with water, reserving some of the water to make the lye solution (see #4 and #5).

11. Prepare lye solution as above (see #5). (Note: UC Davis’ new curing recommendations differ from their old ones at this point. I largely followed the old ones because they had worked for me last year.)

12. Let stand for 12 hours, then drain and test several large olives. If the lye has penetrated, you’re ready to rinse (see #14). If not, a third round of lye is necessary. I felt unsure whether my olives were done, so I decided to do a third round of lye.

13. I prepared a weaker lye solution at this point, mixing 2 TBS granular lye per gallon wearing my protective gear. I let the olives stand for another 12 hours.

Leaching lye out of olives, step-by-step

14. After 12 hours, the lye test showed full penetration. I drained, then rinsed the olives twice by filling the bucket and draining it. Don’t forget to let cold water run in the sink while draining the lye.

15. After rinsing twice, I filled the bucket with cold water and let the olives stand for 12 hours. For the next 2-3 days, you drain and add cold water every 12 hours to leach out the lye. You do not have to measure the water for this step.

16. After 2-3 days, taste an olive to check for lye. Lye tastes soapy and feels soapy to the touch. When you can no longer taste the lye, you are ready for the next step. It may take up to 8 days to complete the leaching process.

17. I continued to drain and refill every 12 hours until day 6, when by taste and touch, I felt the lye had been thoroughly leached out.

18. The next steps depend on how long you wish to store your olives. We store ours in the fridge, so we follow the long-term storage recommendations, a two-step process. (You can also pressure-can them.)

Brining for long-term storage

Step 1: Medium brine

18. For long-term storage, the olives first undergo a weeklong soak in a medium brine. This prevents them from wrinkling during the strong brine. I gently pour my olives into the sink for a final rinse of water and cull any that have fallen apart, have sunken or discolored soft spots, or look otherwise ‘suspicious.’ I add warm water to my bucket (using the water measurement for the lye treatment; see #3) and make the brine by mixing 3/4 cup pickling salt per gallon of water. Then I add back the olives. They sit like this for 7 days.

Step 2: Strong brine

19. After 7 days, the medium brine solution is poured off and replaced by a stronger brine – 1 1/2 cups of pickling salt per gallon of water. The olives steep in this for 10-12 days, before the final brine.

Final brine for refrigerator storage

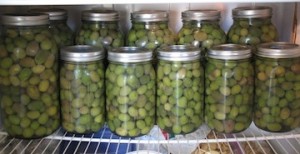
20. I poured off the strong brine and prepared a final brine for the olives, again at a rate of 1 1/2 cups of salt per gallon of water. I store olives in mason jars, so I pack the olives in the jars, then pour this brine over them, covering them completely. Then they go into the fridge. UC lists ‘long-term storage’ as ‘2 months or less.’ We have stored our olives in the fridge for up to a year without any problems.

Olives are stored in fridge in 2-quart/half-gallon and 1-quart jars. Ok, maybe next year I'll be pressure canning them.

Olives hogging the fridge, stored in 2-quart/half-gallon and 1-quart jars. Ok, maybe next year I’ll pressure can them.

Eating the olives (!) 

21. Before eating, soak the olives in plain water for about 24 hours to leach out the salt. Refreshing the water once or twice during this time helps, but isn’t necessary. You may leach for more time or less, depending on how salty you want your olives. Taste after about 12 hours and take it from there.

Enjoy!

Honey Harvest, Winter Preparations and Follower Boards

As I mentioned in my post ‘Fall Blooming Plants for Bees,’ there wasn’t much honey to harvest this fall because our summer nectar flow occurred earlier than usual. In fact, I only took ‘extra’ honey from two colonies out of seven. While four others have some curing nectar and capped honey, they do not have the recommended 3-4 frames of capped honey, and I wonder if they will starve this winter.

It’s tempting to start feeding, but we have adopted the ‘natural selection’ view of beekeeping. The more we interfere, the more we facilitate the propagation of bees that require help to survive. We would rather propagate bees that can adapt to whatever conditions present themselves. Last year, we had one hive with zero stores going into winter that survived. In our climate and in the suburban locales where we keep our hives, the bees can find forage nearly year-round, if it’s not too cold to fly.

The Farmer’s Almanac calls for a bitterly cold winter this year, but the Almanac has been wrong for the last few years. We’ll keep our fingers crossed.

Four of the six hives I inspected through September had excellent populations, and two in particular had excellent brood patterns. Two of the colonies may ultimately dwindle. One had abandoned half of box two to wax moths, and I performed a massive clean-up job. The other seemed abnormally agitated, and their numbers seemed a little small.

I finished rearranging and condensing all the hives by mid-October.

With the use of follower boards, we’ve taken advantage of the ability to condense hives vertically rather than horizontally. For example, we had a small colony last fall that we could have condensed to one brood box, with 10 frames. Instead, we condensed to two brood boxes, with 6 frames each, under the assumption that a small cluster would be more able to move upward to their stores as a group, rather than disbanding to access stores on the outer edges of a box.

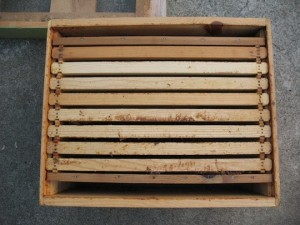
Follower boards have the added advantage of allowing for easier frame manipulation. When inspecting a hive, you remove one follower board and about 2″ of space opens up. The common configuration is 8 frames sandwiched between 2 follower boards per 10-frame box.

A standard 10-frame Lang box, with 8 frames sandwiched by follower boards.

A standard 10-frame Lang box, with 8 frames sandwiched by follower boards.

For those who haven’t heard of follower boards, they are essentially solid frames. When I made them with a beekeeping friend, we used tongue-in-groove planks cut vertically to size (mediums or deeps). We also cut to size a strip of wood that acted as the top bar, and screwed it into the sections of wood. The ones I buy are made of 1/2″ plywood with solid wood top bars.

Homemade follower board, top; store-bought follower board, bottom.

Homemade follower board, top; store-bought follower board, bottom.

In addition to allowing for a wider variety of hive configurations and making frame manipulation easier, Serge Labesque asserts that follower boards promote air circulation. In theory, air convects upwards from the entrance and screened bottom board between the outermost frames and follower boards and exits through the inner cover out of the nest. Excess moisture is transported out of the hive via this airflow. Further, the space between the outermost frames and follower boards has an insulating effect, protecting the brood nest from extreme heat in summer.

Beekeeping still remains much of a mystery to me. We continue to find whatever balance we can between caring for our bees and interfering with them as little as possible. We want healthy bees, but we don’t want the responsibility to be solely ours. In our struggle, we hope we are helping the bees become stronger.


Fall Blooming Plants for Bees

While the chickens ran around one evening, I planted some new plants in the pollinator bed: Sedum ‘Autumn Joy,’ Zauschneria ‘UC Hybrid,’ Gaillardia ‘Golden Halo,’ and an ornamental Oregano called ‘Brittany Show.’ Additionally, I replaced the dead sorrel and Agastache foeniculum (Hyssop) in the herb bed with Stevia and Agastache foeniculum ‘Golden Jubilee’ (‘Golden Jubilee’ Hyssop).

Our bees are having a hard time this fall. When Sarah and I inspected hives in July, we thought we were in for a bumper crop of honey. When I started going out in early September, however, I discovered a different story. Most of our hives don’t seem to have enough stores to get through winter.

Many beekeepers in our area are experiencing the same phenomenon. The consensus is that our mild winter and cool summer pushed the plants that comprise our summer nectar flow to bloom much earlier, and that our lack of usual rainfall reduced nectar production. The bees accordingly were up to their roofs in honey back in July, then started using their stores as summer wore on (US Honey Report September 2013).

While ‘Fall is for planting’ might have begun as a marketing ploy for nurseries to encourage sales during a slow time, it is a great time to plant. And, it’s an especially great time to plant fall bloomers for the bees. Here’s a list of plants I see humming with activity in my travels. They do well in USDA Zone 9b, but many will perform in other zones, too (click on the link to find your zone).

  •  Agastache species: Both the herb (A. foeniculum or Hyssop) and ornamental species (especially A. mexicana and A. aurantiaca cultivars & hybrids) attract bees, but the ornamental species bloom all summer and fall for us. I’m not sure how bees get to the nectar, because the flowers are long, but they must.
  • Alyssum: An annual that takes care of itself. Bees hit it when there’s not much else happening, like now.
  • Baccharis pilularis & cultivars/Coyote Brush: A California native not necessarily attractive enough for a small garden, but good for hot slopes and farther-away spots.
  • Basil: It’s hard to let basil go to flower, because the leaves become spicy and bitter, but if you do, the bees will come in droves. I like to cut basil back on rotation: I cut a few plants back for me, and leave others in flower. Then I return and cut back the ones in bloom, and leave the ones I’ve been harvesting to flower and so on.
  • Borage: Always a favorite, whenever it is blooming. Ours reseeds itself all year long, and blooms whenever it’s ready till late fall.
  • Caryopteris x clandonensis cultivars, such as ‘Dark Knight’ and ‘Blue Mist’/Bluebeard: This is a woody, deciduous perennial/sub-shrub that most folks around here don’t appreciate. That’s too bad, because it is one of the best fall bloomers for bees.
  • Cuphea hyssopifolia/Mexican Heather: This one surprised me, but I have seen bees on it throughout the year, especially in fall. This plant has faded from the nursery scene around here because it freezes most winters, but I have some clients who still have it, and it’s a keeper.
  • Gaillardia grandiflora cultivars/Blanket Flower: A bee favorite, but not always a long-lived perennial, especially if it gets too much water. ‘Oranges & Lemons’ often blooms year-round for us. Gaillardia is worth it, even if it’s short-lived.
Gaillardia 'Golden Halo'

Gaillardia ‘Golden Halo’

  • Lavandula stoechas & varieties/Spanish Lavender: Reblooms for us about now, and much appreciated by bees, who generally love lavender.
  • Loquat: This might be a winter bloomer, but ours is blooming now this year.
  • Nepeta x faasseni and cultivars/Catmint: Follows up its summer bloom with a lesser show through fall.
  • Origanum vulgare/Oregano: The edible oreganos, both Greek and Italian, bloom about mid-summer through fall. Italian oregano in particular gets rangy and the bees’ activity on it never really slows, so I always struggle to decide when to cut it back. This year, I cut it back in stages (see Basil above). It’s already reblooming.
  • Rosmarinus officinalis ‘Irene’/’Irene’ Trailing Rosemary: A trailing form that stays flatter, and seems to bloom most of the year.
  • Salvia chiapensis/Chiapas Sage: For us, blooms nearly year-round, until it gets very cold. In fall, it is much visited.
  • Salvia ‘Hot Lips’/’Hot Lips’ Sage: Another year-round favorite, till it gets cold. You’ll also see hummingbirds and various native bees on this one.
  • Sedum spectabile cultivars: Definitely a bee favorite. I only wish it had secondary blooms and bloomed longer.
  • Thymus/Thyme: Another herb that blooms summer and early fall, or longer, depending on how much water you give it. English thyme seems to bloom longest, and the creeping or groundcover cultivars will throw a smaller second bloom in fall.
  • Trichostema lanatum & cultivars/Woolly Blue Curls: A California native that blooms in the pollinator bed nearly all year, till it gets very cold. I have read that the honey from Trichostema crystallizes quickly.
  • Vitex agnus-caste/Chaste Tree: Begins blooming in later summer and continues into early fall. It really does turn into a tree if you don’t prune it hard every year, but even then it gets large. Luckily, there are some smaller selections, such as ‘Amiguita.’

Homemade Plum Wine, 2013

I learned a few lessons last year making plum wine for the first time (Plum Wine Results). I’m not sure which is most important, but the number one change I made this year was using ripe fruit. Of course, the plums ripening coincided with my family’s annual get-together, so before I left, I went through boxes of fruit on a daily basis, bagged ripe plums, and stuck them in the freezer, whole.

Juicing the plums

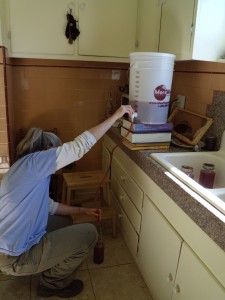
When I finally had time, I thawed the plums overnight in a big plastic crate and began juicing. As I did last year, I juiced by hand, squeezing fruit then tossing it into a fine-mesh nylon bag strapped over a 5-gallon bucket. When the fruit pulp had reached about the size of a soft ball, I held the mesh bag in one hand and squeezed and milked with the other until I felt satisfied with the amount of juice extracted. If you have help, you can wait till the pulp is bigger in mass before squeezing. I was working by myself, and the softball size worked well for my hand size.

Plastic crate to left; juiced plum debris for liqueur in middle; me and my softball-sized bag of squished plums to juice in foreground. I juiced directly into the bucket that I used for my primary fermentation.

Plastic crate to left; juiced plum debris for liqueur in middle; me and my softball-sized bag of squished plums to juice in foreground. I juiced directly into the bucket that I used for my primary fermentation.

Since last year’s plum liqueur was the true star of the season, I didn’t try to squeeze every last ounce of juice out of the pulp. I figured some juice would be useful in this year’s batch of plum liqueur.

Starting the wine

I ultimately produced about 5 gallons of juice. I ended up freezing half a gallon, and used the remaining 4.5 gallons for the wine. I added campden tablets, even though I had frozen the fruit, because the juice sat out for periods in the kitchen. The recommended rate is 1 tablet per gallon of ‘must.’

I have also semi-graduated to wine-speak, mostly so I don’t make an ass out of myself when I go ask questions at the brew shop.

One difference between the process I follow (courtesy of our friend Richard) and recipes I have found online is I use straight juice versus smashing fruit and adding water. It is recommended to allow the must and campden tablet mixture sit at least 24 hours – and no more than 48 – before beginning the process of making wine.

When I was ready to proceed, I added sugar at a ratio of one pound to one gallon of  must, again per Richard’s recipe. This time, instead of dissolving before adding, I added straight to the bucket, and stirred and stirred until the sugar was dissolved. After I added and dissolved the sugar, I scooped out some of the must and made my yeast mixture in a pint jar that I had sterilized.

Adding the yeast

Last year I used champagne yeast, and sure enough, my wine had an off-flavor of champagne. So this year, I used EC-1118, also recommended for fruit wines. While it is also a champagne yeast, I thought it might yield a wine a little less dry than the champagne yeast. At least, that’s what the guy at the brew shop lead me to believe.

Once the yeast started taking off, which took about 15-20 minutes, I gently poured it across the surface of the must, as I had read somewhere I should do, then covered my bucket with another mesh bag, bungee-corded in place.

If you want a clear wine, you can also add pectic enzyme. This helps break down the pectin in the juice, so that the resulting liquid is clear versus opaque. I didn’t add pectic enzyme because I’m ok with the opaqueness. It’s not a displeasing murkiness; it’s just opaque, and the color is vibrant. I used Santa Rosa plums, so the color is a rich magenta. If you want to use pectic enzyme, I think the recommended rate is 1 teaspoon per gallon of must.

The primary fermentation

Back to my bucket: I have read tons of talk on brewing and wine-making forums about yeast and oxygen and oxygen and oxidization. Richard’s original recipe had his must and yeast working away for a week or so in a bucket covered with panty-hose before he racked and transferred to a carboy. I did that last year, but this year, I let the bucket sit like this for 48 hours, before securing the lid and air-lock in place. It seemed like a good balance between letting the yeast proliferate in the presence of oxygen and sealing the wine off from oxygen.

As it is, the yeast went nuts before I secured the lid and airlock. I believe this is largely due to the location of the bucket – about 6′ away from the oven – and one 36-hour jam session. The must actually rose all the way to the top of the 6-gallon bucket before collapsing. Yikes. Some forums say the yeast going fast and hard can affect the flavor of the wine, so I am concerned about the eventual flavor. But it is also known that champagne yeasts go hard, so I am keeping my fingers crossed.

After securing the lid and air-lock (my bucket has a pre-drilled hole that fits a #6 or #6.5 rubber stopper, into which an air-lock fits), I left the wine alone for a few days before looking into the bucket via the hole to monitor the activity. I believe it took about 6 days for most of the activity to die down.

First racking

At this point, I racked the wine into my glass carboy, which I had sterilized. I didn’t have a racking cane, which I do now, so I aimed the spigot at a funnel seated in the carboy and lined with a mesh bag, and turned ‘on’ the spigot. The spigot was about 6-8″ away from the funnel to minimize splashing and oxygenation. There was a lot of debris!

Last year’s wine also was not sweet enough, which I did not realize until we had bottled it. So, after racking into the carboy, I added 2.5 more pounds of sugar directly into the carboy. I swirled this around until it was dissolved, then wrapped the carboy with a towel to protect it from light and put it to rest under the dining table.

The secondary fermentation, second racking & first taste test

After a few days, more yeast activity showed. This went on for about a week and a half or two weeks, until the yeast dropped to the bottom of the carboy. I ultimately let the wine sit in the carboy for about a month before racking again. That’s where it stands now.

As I mentioned, last year’s wine was not sweet enough for us. And, after tasting some of this year’s batch during this second racking, I can say it still isn’t sweet enough. This year, however, I know to back-sweeten BEFORE bottling, which is my plan. I think I’ll let the wine sit for awhile before adding sugar, on the off-chance that any yeast might still be present, and hungry.

Always more to learn

Next year, I think I’ll double the sugar ratio, say, two pounds per gallon of must vs. one pound per gallon. I hesitate to make too sweet of a wine, and it’s also possible that the wine, once aged, will be tasty enough as is. The learning curve continues.

Winter Vegetable Varieties

winter veggies

I confess: I love winter veggies more than summer veggies. When people talk about how GREAT homegrown tomatoes are, I like to interject: ‘Yes, but what about homegrown cauliflower? Or kohlrabi? Or peas?’

In that spirit, here’s a rundown of what’s out there in the greenhouse, germinating and growing. As an aside, I used to have a system: I’d plant seeds in jumbo six-packs, water once, place in a small cold frame (pre-greenhouse), then wait for germination before watering again. That served me well when I used Fox Farms’ Potting Soil, by far the best potting soil I have ever used for starting veggies and flowers.

A little over a year ago, however, my local source stopped carrying it because they ‘liked’ the salesperson of the new soil they’re now supplying. This soil is inferior. Germination was a little inconsistent, and it did not work at all for the lettuce and spinach seed, which I had to re-sow using Fox Farms. Now, 11 days later, the lettuce and spinach are germinating. In the greenhouse, we’ve also started covering our cell packs with a plastic sheet until germination. This helps conserve warmth, and seems to speed along germination.

Beets: Sarah is a big fan of beets. I like to grow them, but I’m not able to keep up with the harvest. For reds, good ol’ ‘Early Wonder’ is a long-time favorite, and at least around here, tends to bolt less quickly than some of the other reds, such as ‘Detroit Red’ and ‘Dutch Baby’. For yellows, the basic ‘Golden’ beet has served me well, and of course, there’s ‘Chiogga.’ It’s not an especially creative selection of beets, but all perform very well for us.

Broccoli: I wish I had made a list of all the broccoli varieties that I have tried over the years, because there have been many. I like that many of the newer varieties are selected for side-shoot production, and ‘Sorrento’ is one of these. It makes a medium-sized head and tends toward good-sized side-shoots, even before the main head has been removed. The heads of ‘Umpqua’ get quite large, but they can get ‘chalky’ if left too long. If our broccoli heads get too big, we let them go to flower for the bees. Bees love broccoli flowers, less so cauliflower.

Cabbage: We tried a variety called ‘Parel’ last year and were really happy with it. Not only is it small (about 6–7″), and thus manageable, it’s incredibly tender and sweet. I have had success harvesting red cabbage plants in late spring/early summer, leaving the stalk, and getting a second crop of several smaller cabbages late in summer or early fall. I did this last year with ‘Ruby Ball,’ another smallish variety. I’m going to try that method with ‘Parel’ this year. It’s a great way to jumpstart the fall and winter garden, and this pleases me.

Small heads of 'Ruby Ball' cabbage developed through the summer and are almost ready to harvest.

Small heads of ‘Ruby Ball’ cabbage developed through the summer and are almost ready to harvest.

Carrots: I have had the best results from ‘Nantes’ and ‘Nantaise,’ which seem less finicky than other varieties if the soil isn’t perfectly friable. Yes, you’ll get some misshapen ones, but overall, these two varieties produce a dependable carrot that has excellent texture and flavor at any age. We also found ‘Nantes’ to have good keeping quality right in the soil.

Cauliflower: I’ve landed on ‘Snow Crown’ as my go-to cauliflower. It produces massive heads, if you let it, which stay tender and tasty. But this variety can be a little unforgiving if you don’t get starts into the ground when they’re ready. We have a favorite cauliflower recipe, courtesy of Madhur Jaffrey’s Indian Cooking (1982). It’s simple, quick and amazingly delicious. In fact, that may be all we use our cauliflower for. I make this in my big sauce pot, because I often double the recipe. It goes quickly.

Cauliflower with fennel and mustard seeds/Baghari phool gobi

Ingredients

  • 1 large or 1 1/2 medium cauliflower, cut into flowerets about 2″ long, 1″ wide (at the floweret) and 1/3″ thick (I’m not that careful, but the pieces should be somewhat uniform, so that some aren’t over- or under-cooked.)

  • 7 Tbs vegetable oil (I’ve used canola and olive, or sometimes olive oil and butter)
  • 2 tsp whole fennel seeds
  • 1 Tbs whole black mustard seeds
  • 1 Tbs very finely minced garlic (one heaping Tbs for us)
  • 1/4 tbs turmeric
  • 1/4 – 1/3 tsp cayenne (I use 1/8 – 1/4 tsp)
  • about 1 1/2 tsp salt (I use a total of 2 when doubling; this is a salty dish)
  • 4 Tbs water

Soak flowerets in water for at least 30 minutes. Drain just before cooking. Heat the oil in a large pan over medium; when hot, add the fennel and mustard seeds. When they start to pop, add the garlic and fry until the garlic is lightly browned. Add turneric and cayenne. Stir once, then add cauliflower, salt and 4 Tbs of water. Stir and cook on medium heat until the cauliflower is just done. It should retain its crispness and there should be no liquid left. Add more water if it evaporates before the cauliflower is cooked. Devour.

Chard: I always grow a chard plant or two, for those times I’m sick of kale and/or the spinach needs a break from harvesting. ‘Bright Lights’ seems to be popular, and I do like it. It’s milder than the straight red-ribbed varieties, and it adds a splash of color to the garden and plate. I really like ‘Fordhook Giant,’ which is a straight green-leafed variety. Its flavor is succulent, and a little more spinach-like. We were also able to get the chard to grow through our cool summer this year. We didn’t eat it as often as we fed it to the girls, but I was glad to have fresh greens for them.

Fava Beans: I like to grow favas every winter for soil-building, eating and bee forage. I’ve always grown ‘Broad Windsor’ because I didn’t know any better. Last year, however, my acupuncturist alerted me to the myriad varieties out there, and gave me a few pounds of ‘Superaguadulce morocco,’ which I plan to try this year. I’ll keep you posted.

Garlic: Sarah is a master ‘Elephant’ garlic grower, and it is very satisfying to harvest baseball to softball-sized bulbs of garlic. For others, we gravitate to the hardnecks. I’ve grown ‘Spanish Roja’ about three years in a row in clients’ gardens, and that always performs well, even when you worry that it won’t. ‘German Red’ is fun for its uniform clove size and overall appearance. One of last year’s better performers was ‘Susanville,’ a softneck variety, which yielded nice-sized bulbs and has a milder flavor for fresh eating. We also really like ‘Duganski’. There’s a whole universe of garlic varieties out there; last year we tried about eight, but the above were the best performers. I also experimented last fall with planting small cloves to see how they would perform; most of the literature says to only plant the largest cloves. I’m glad I did, because for whatever reason(s), many of these small cloves did just as well as the larger ‘prime’ cloves. If you’re concerned about garlic white rot, check out this link.

Kale: I like a variety of kales and have settled on a few favorites. ‘Winterbor’ and ‘Blue Curled Scotch’ are especially good for fresh eating. I also like ‘Nero di Toscano’ (Dinosaur Kale) and ‘Russian Red’. I bought a seed blend called ‘Wild Kale Blend,’ but found it to mildew rather quickly in the greenhouse. Nonetheless, I’m trying it again this year, with the goal of planting it out sooner. We’ve been able to get Dinosaur kale and ‘Blue Curled Scotch’ to grow through the summer for the past few years: we pinch the flowers when it wants to bolt in the hottest parts of summer, but we’ve had cool summers, so it’s performed nicely.

Kohlrabi: Kohlrabi used to be my favorite winter vegetable. I was so excited to eat something raw and sweet, rather than steamed or cooked, in the middle of winter. I ate it by itself mostly or used it in salads, and often included it on veggie trays I composed for parties. The one time I did steam it, I was really disappointed by how much character and taste it lost. I’ve stopped growing it, because for the last few years, I didn’t harvest when it was prime: at about 2–3″. I’m not sure there are better varieties than others, but I do think it’s critical to harvest at the right size, so that it’s sweet and tender. I will say that I prefer the green varieties over the purple varieties.

Leeks: We like leeks, but we have a limited reparte when it comes to using them. And we haven’t experimented much with varieties: we grow what we buy as starts, typically ‘King Lear.’ Who knows if these are the best? But I include leeks here because I discovered a few years ago that I could let unharvested ones go to flower and sit in the ground all summer with or without water. In fall, I cut them to about 6″, and start watering them (if I haven’t been), and presto, they start forming new leeks from the over-summered bulbs. These leeks will eventually reach an excellent size, and apart from the crop rotation question, I don’t see why I shouldn’t keep propagating this way. At one client’s garden, we have been growing leeks like this for 3 years.

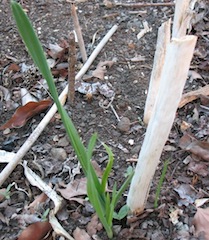
Leeks re-sprouting after a summer of rest.

Leeks re-sprouting after a summer of rest.

Lettuce: I like the romaines for overwintering around here, and the Garden Heirloom Blend by Territorial Seed Company is my hands-down favorite. It’s not strictly romaines, but it features several, and for size, tenderness, flavor, and slowness-to-bolt, it cannot be beat. In spring, I am a salad hound, combining lettuce, spinach, Tah-Tsai mustard, kale, and fresh herbs, like cilantro or dill.

Mustards: Mustards kind of burn my sinuses, so I like the milder ones. ‘Tah Tsai’ is one of my favorites for its texture, flavor and shape, and it’s pretty much the only one I grow these days. I eat it fresh, and if cooked, a very light braising is what I’d recommend. Otherwise, its character gets a bit lost. I have grown ‘Mizuno’, which I like when young, and we are trying ‘Red Streaks’ this year, so stay tuned.

Onions: We’ve been experimenting with storage onions in these parts for the last few years and have landed on ‘Yellow Granex’ and ‘Red Amposta’ as good selections for our climate. This past spring, both cured themselves directly in the beds, without flowering or needing to be knocked back. Both yield a medium-sized onion, which might be due to my propensity toward dense planting. I also like to use them as ‘green onions’ when they’re young, thereby thinning them. When I do this, the occasional ‘Red Amposta’ will achieve a larger size, but the ‘Yellow Granex’ tends to stay in the medium range. For a true green onion or spring onion, my all-time favorite is ‘Purplette.’ It’s great when it’s young: crispy, with a sure, but light, flavor, and these features carry over into spring when I harvest when the bulbs are 1–2″. I love fresh favas, sauteed with ‘Purplette’, tons of garlic, salt, and olive oil.

Peas: We love ‘Sugar Snap’ peas. Very traditional, but pretty awesome at any size. ‘Oregon Sugar Pod II’ is a good snow pea variety. We usually plant both. It’s rare for them to make it back to the kitchen once harvested, and Sarah’s mom will tentatively ask if she can pick some, too. I’ve tried shelling peas, but we don’t have enough space to warrant devoting that much for the size of the yield. Besides, I like eating the pods.

Spinach: I have settled on ‘Olympia’ as my favorite. It is semi-savoy, with thick, large leaves and full flavor. It also produces for a very long time before bolting in spring, and it withstands our cold spells (20s–30s°F). We also tried ‘Bordeaux’ a few years ago from Sarah’s seed stash. It was pretty and tasty. I’ve grown ‘Bloomsdale’ for clients, which is tasty and also does well around here, but it can be slow during cold spells. For Sarah’s Spinach pesto recipe, click here.

The weather can be part of the fun and challenge of winter vegetable gardening, but ‘fun’ is the operative word. Have fun!

What Makes ‘Good’ Bees?

Our top-bar hive, Mondo, is going into her third year. In the past two weeks, we have witnessed several mass orientation flights beginning at about 3:00 in the afternoons. We always call these ‘hatch-outs,’ as if a new generation of bees within the hive has emerged, thus graduating older bees to the status of foragers. These newly minted foragers must first orient to the hive to mark their place in the world.

The truth is, we’re not really sure that’s what’s happening. Sometimes we’re positive they’re about to swarm. Then again, mass orientation flights can disguise a virgin queen who is orienting before she goes out on a mating flight. In any case, it’s always exciting to watch. And it’s loud!

IMG_1430

As we think about propagating our hives, we consider bee genetics, as expressed by their desirable and undesirable traits. Mondo has lived two years without treatment for diseases or pests, including Varroa mites, but that is about all we know, since I won’t let Sarah work the hive. Their home is a hastily built top-bar hive, rectangular and too deep. The bees have cross-combed between bars and attached comb to the sides of the box. The few times we’ve gone in, we’ve done a lot of damage.

We assume she’s a good honey-producer, since Dave, a direct progeny, was, and her bees are mostly mellow. This last trait, however, seems to be contingent on what’s happening in the hive. When I looked up into the hive several weeks ago, she seemed agitated and as I took photos yesterday, wearing my black vest, I received buzz-bys of various comment: back off, or, who are you?, or, get out of my way.

Many researchers now acknowledge that part of honey bees’ struggles results from their limited genetic make-up. Of the more than 24 recognized honey bee subspecies in the world, honey bees in the U.S. derive primarily from the Carniolan and Italian subspecies. Add that to the practice among queen breeders of instrumental insemination (vs. open mating) and you end up with a pretty limited gene pool. And limited genetics make for a limited ability to respond behaviorally or physiologically to challenges, such as pests, diseases, or a changing environment.

To some degree, honey bees are a domesticated animal. When we select for certain attributes, we inadvertently select for others, and deselect yet others. Mondo and her progeny seem driven to produce great quantities of queen cells, certainly more than I’ve read about in most literature or heard fellow beekeepers describe. Further, her virgin queens seem to prefer sorting things out after swarming, whereas most literature cites this sorting out as occurring before swarming. The swarm that became Mondo contained around 10 queens; Dave’s swarm had four that we counted; Hortensia had six, but a large subgroup departed the day after we hived them.

From a colony’s perspective, this behavior may be critical to creating, and testing, the mettle of new queens. But to a suburban beekeeper, these multi-queen swarms provoke ambivalence, especially as one hives a swarm for the second or third time.

But we’re still not sure why Mondo has lived for two years. Does she have ‘hygienic’ behavior, curtailing the spread of mites? Is it that we’re not in the hive disrupting things several times a year? Is it that we’re not taking honey? Is it the hive she’s made her home, spacious, with plenty of air circulation? Does she harbor two laying queens – not unheard of in large colonies – and thus have a back-up? Do her progeny colonies retain two queens?

The scientists, or lay scientists among us could probably sort it out, beginning with the most basic of observations from a monitoring board, and gradually moving their focus from inside the hive to inside the bees. While working in a psych lab in college, where we starved rats to 2/3 their normal body weight so that they would be ‘motivated’ by food in various experiments, I decided that observation might be the most powerful tool with which to learn. Observing some entity in situ may never provide all the answers, but neither does parsing its pieces out so completely that the whole is lost.

I am content to let Mondo do her thing, uninterrupted. You go, girl!

IMG_1406

Homemade Plum Wine Results

The prize.

The prize.

We finally bottled my plum wine a few weekends ago, and for a first batch, it was actually drinkable. Strong as hell, not the tastiest, full of room for improvement, but drinkable.

Strong as hell

I did two fermentations. Twenty-four hours after the campden tablets dissolved, I made a sugar solution in a quart jar with 2.25 pounds of sugar, 16 ounces warm water, and plum juice and stirred it into the juice in the bucket. I then made a yeast solution (with champagne yeast, recommended for fruit wines) and added that.

When the yeast activity slowed, about 12 days later, I transferred the liquid to a carboy, and did another fermentation with the same recipe of sugar solution. This means I added 4.5 pounds of sugar to 4 gallons of straight plum juice. The wine then sat for about 4 months in the carboy.

When I siphoned the stuff into the bucket for step one of the bottling process, just having it in my mouth gave me a gentle buzz. When I had a less-than-8 oz glass with dinner that night, the buzz did not seem alcoholic as much as it seemed other-drug-like. Relaxing and pleasant, nonetheless.

Not the tastiest

Sarah and I both have a sweet tooth, and this wine is sour. It has a nice fragrance and does not smell vinegary, but it is sour. We experimented by adding sugar to the desired sweetness. This made the wine more palatable, but if it weren’t homemade, I can’t honestly say I’d be drinking it. I sent a bottle off to Richard, my plum wine-making mentor, who prefaced his responding email, ‘DO NOT DUMP THIS WINE!’ He’s very positive. He thought the wine was too acidic, but has good color and is decent for a first attempt.

In the meantime, after we bottled it, I discovered all kinds of online literature that pointed to sweetening wine before bottling it, but cautioned that the yeast may undergo another round of activity. A home-brewing friend said champagne yeast is rather notorious for behaving this way and suggested sweetening after opening the bottle.

Full of room for improvement

1. I don’t even really like champagne or other dry wines. And the back-taste of champagne is quite present. I think I’ll research other suitable yeasts.

2. The plums weren’t necessarily ripe. The tree had been stripped clean, plum ready or not. I think I’ll opt for ripe fruit next time, or a bit overripe, or some combo.

3. Yes, I will add more sugar.

4. But I think I’ll taste-test more along the way, too. Doh!

5. Did I let the wine sit in its yeast debris too long? Maybe I should have siphoned it off, then let it sit. I remember Richard saying he strained before letting it sit for a few months.

Drinkable

It is. It has a great color and clarified nicely (an attribute of champagne yeast apparently). It isn’t horrible, it’s just not as good as it could be. I think I have 10 bottles. I used it to cook a pork roast one night. The more applications, the better, I think.

Cheers!

Pre-siphoning. The wine clarified nicely.

Pre-siphoning. The wine clarified nicely.

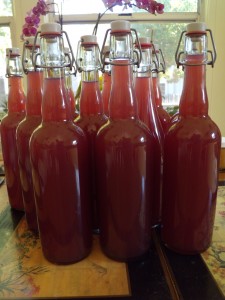
Bottling the wine after siphoning and filtering.

Bottling the wine after siphoning and filtering.

 We made improvements in our 2013 plum wine! Check out Homemade Plum Wine, 2013 for details. If you want to try making the best plum liqueur we’ve ever tasted, read up on Not-Traditional Umeshu.

Not-Traditional Umeshu

One of the by-products of my plum juicing was a few pounds of skin, pits, and pulp with some juice to spare. While I researched plum wine recipes, one of the simpler ones I encountered was Japanese Plum wine, or Umeshu, more like a cordial or liqueur with no yeast and racking involved. While it calls for unripe Ume plums, a traditional Asian plum on the sour side with low juiciness, the recipe suggests Western plums, apricots, and quince might substitute nicely.

For us gardening nerds, Ume plums are the fruit of Prunus mume, which in this hemisphere is known as ‘flowering apricot,’ and which is the mother of several cultivated varieties, such as the once-popular ‘W.B. Clarke,’ a beautiful weeping form. In my early gardening years in Oregon, these small, flowering trees burst out in pink to white bloom in the late winter rains of the Willamette Valley.

Not wanting to waste the pulp, I decided to see if I could make a not-so-traditional Umeshu wine with it. While I wasn’t able to find rock sugar, I found the shochu recommended in the recipe. This is a clear alcohol, typically between 25 and 42 proof, commonly distilled from sweet potatoes, barley, rice, buckwheat, or some other grain. I found one made from barley, 48 proof, in the ‘Vodka’ section of a chain liquor store.

Everything I ever learned about math I have forgotten

I weighed my pulp to calculate the right proportion of cane sugar. The recipe calls for a ratio of 1 pound plums to 1 pound sugar for Ume wine. Since I used Santa Rosa plum pulp, I decided to use less sugar, roughly following the 60% plum and 40% sugar recommendation. Since my math skills leave much to be desired and I am a terrible record keeper, I suspect I weighed the plums, then halved the weight and added that amount of sugar plus some so that the sugar weighed about three-quarters what the plum pulp had (eg, if I had 6 pounds of pulp, I added 3 pounds of sugar, plus about 1 pound. See what I mean?).

I used a 2 1/2-quart jar with a rubber gasket lid, layering the plum pulp with the sugar. I decided to add fresh tarragon from the garden for a twist, placing five or six 4–6″ sprigs in two of the three layers. I finally covered it all with shochu.

plum:tarragon

Since we had a small Santa Rosa plum harvest, I decided to also make a batch of plum liqueur with whole plums, more like the recipe. For this batch, I used a 2-quart mason jar with a screw-on lid. I again used the 60% : 40% recommendation, or something close. I also added 4 chunky stems of lemongrass from the garden in one of the layers. Since the recipe states that the jar should only be filled halfway, I did so, then added the shochu to cover the plums et al.

plum:lemongrass

Ch-Ch-Changes

For the record, I should share a few modifications. First, because the plum pulp was so dense, and I could see air pockets in the jar, I decided to shake the jar after a few days to dissolve some of the sugar so that the shochu could penetrate to the bottom. This dissolving might have happened on its own, but I tend to worry a bit, so I facilitated the process.

Second, after about a month, I ended up adding more shochu to both jars. In the mason jar with the whole plums, a bit of mold formed on a part of a plum above the level of the shochu. I opened the jar and removed the mold, then added more shochu, so that it was well above the level of the plums, to about the 3/4 mark of the jar. I also changed out the lid for a new one. To be safe, I added more shochu to the other jar, too, nearly to the top. Throughout the next five months, I shook the contents of both jars gently to guard against further mold growth. It seemed to work. Neither jar exploded, as the author has experienced.

Five months later

A few weeks ago in mid-January, I strained the contents of the plum pulp liqueur. I used a fine mesh bag that I had used to juice the plums, and ‘milked’ the contents into a bucket and bottled it. This batch is amazingly jammy and velvety, and has quite a bit of sediment, which I am ok with. We couldn’t taste the tarragon at all. I probably used too little, since I was worried about an overwhelming taste or bitterness. Next time, I might lightly bruise it. In this batch, the ratio of solids (plum, sugar) to liquids (shochu) was roughly visually equal.

I then strained the other batch, made with whole plums. Again, we could not taste the lemongrass. If I were to use lemongrass again, I would lightly crush it. Since this batch had a significantly higher ratio of alcohol to solids, we had to take a few tastes before deciding we really liked it. The shochu imparts a little sweetness, but the plum taste comes through, less jammy, but fruity nonetheless. This batch, too, has quite a bit of sediment. I suspect that if I had not squeezed out nearly every drop of liquid in both batches, the sediment might not have made it through the bag’s filter.

Unscientific conclusions

In both batches, the sugar content did not detract from the fruit’s flavor, but I would still add less next time, say, half or one-third the weight of the fruit. Santa Rosa plums have a nice balance of sweet and tart, which I would like to experience more in the liqueur. And I am going to use this rough fruit to sugar ratio in the next liqueur recipes I’m dreaming up. I hope the ratio is rather universal, and not specific to plums, apricot or quince.

The success of the plum pulp liqueur suggests that it may be possible to use fruit debris left over from other projects to make a liqueur; I even thought of reusing the pulp just to see what kind of flavor I would get on a second generation batch. But I decided to move on to the next creation.

I have been bitten by the liqueur bug.